
Nullam dignissim, ante scelerisque the is euismod fermentum odio sem semper the is erat, a feugiat leo urna eget eros. Duis Aenean a imperdiet risus.

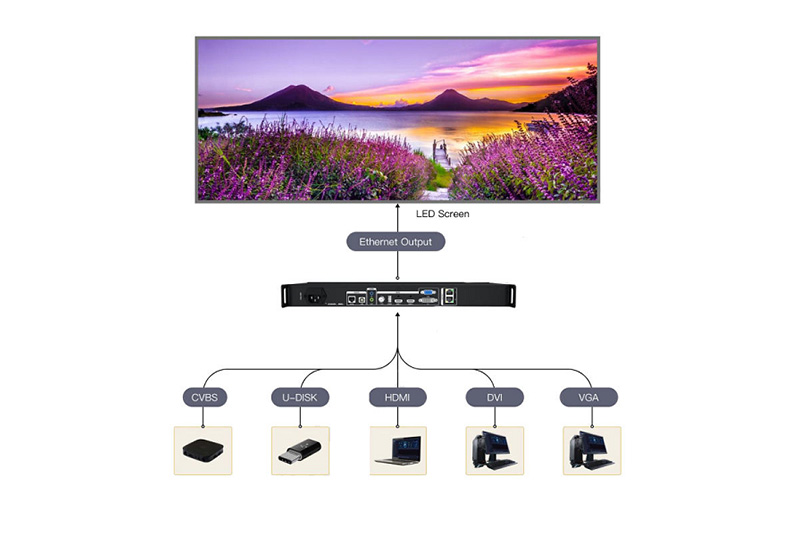
Connection
Controller
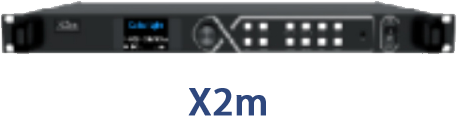
X2M
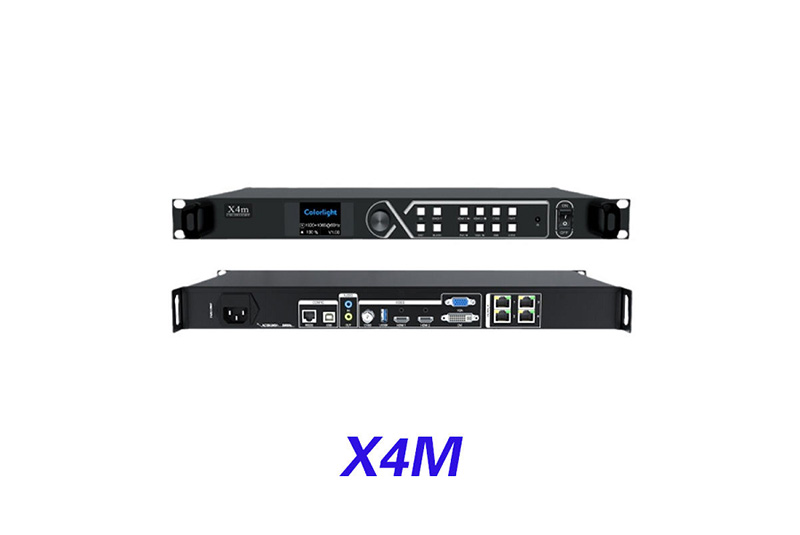
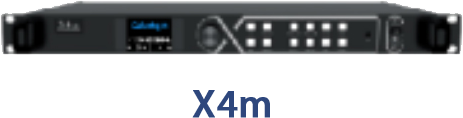
X4M
Connection
Controller
X2M
X4M

LED Screen Controller Video Processor

Model: X2M,X4M, X6
All-in-One Controller

Product introduction

Introduction

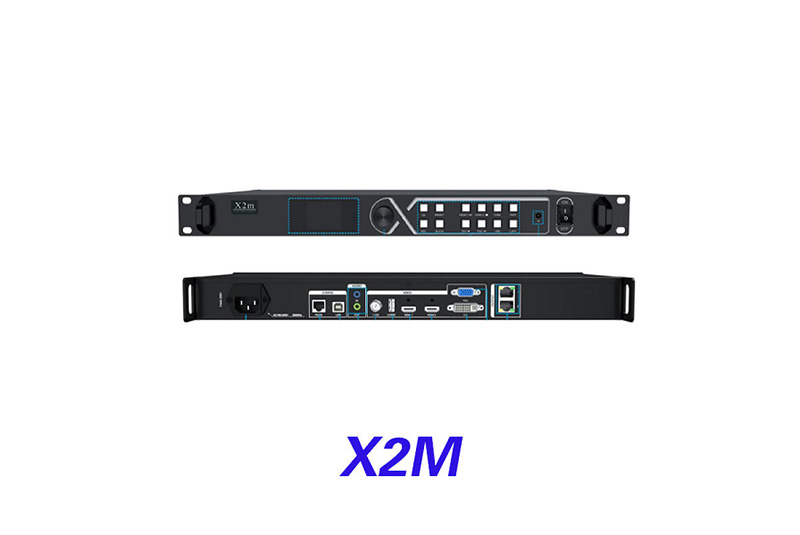
X2m is a professional LED display control device with powerful video signal sourceand processing capabilities. It can handle up to 1920×1080 HD digital signals, supports various types of HD digital interfaces, and supports arbitrary zooming andclipping of video sources. In addition, the X2m supports USB flash drive content playback. X2m has 2 gigabit network port outputs and can support maximum3840 pixels inwidth and maximum 2000 pixels in height. At the same time, X2mhas a series of practical functions, providing flexible screen control and high-quality image display, which can be perfectly applied to small LED display


Thanks to its powerful video processing and sending capabilities and other outstanding features, the VX400 can be widely used in applications such as medium and high-end rental, stage control systems and fine-pitch LED screens.

X2M


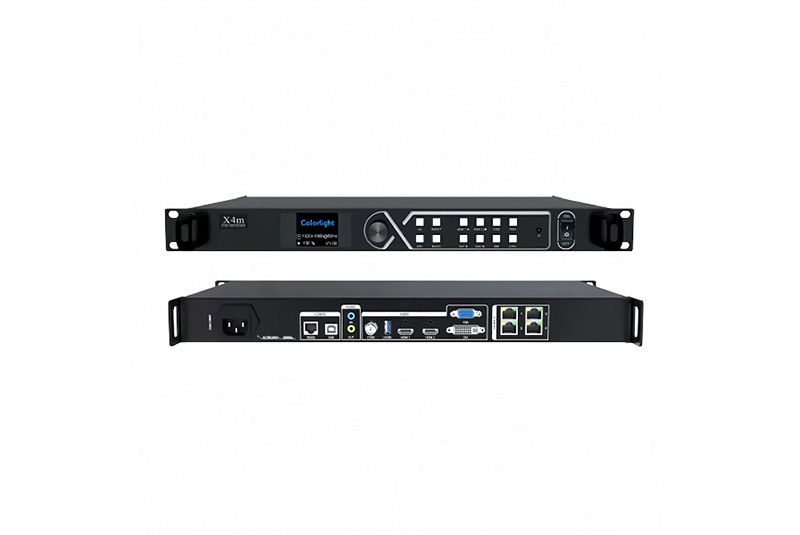
X4m is a professional LED display control device with powerful video signal sourceand processing capabilities. It can handle up to 1920×1080 HD digital signals, supports various types of HD digital interfaces, and supports arbitrary zooming andclipping of video sources. In addition, the X4m supports USB flash drive content playback. X4m has 4 gigabit network port outputs and can support maximum3840 pixels inwidth and maximum 2000 pixels in height. At the same time, X4mhas a series of practical functions, providing flexible screen control and high-quality image display, which can be perfectly applied to small LED display

X4M


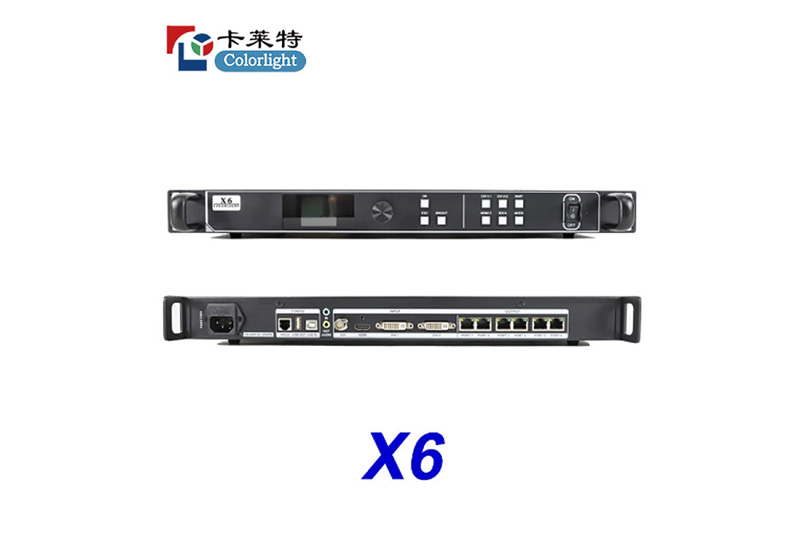
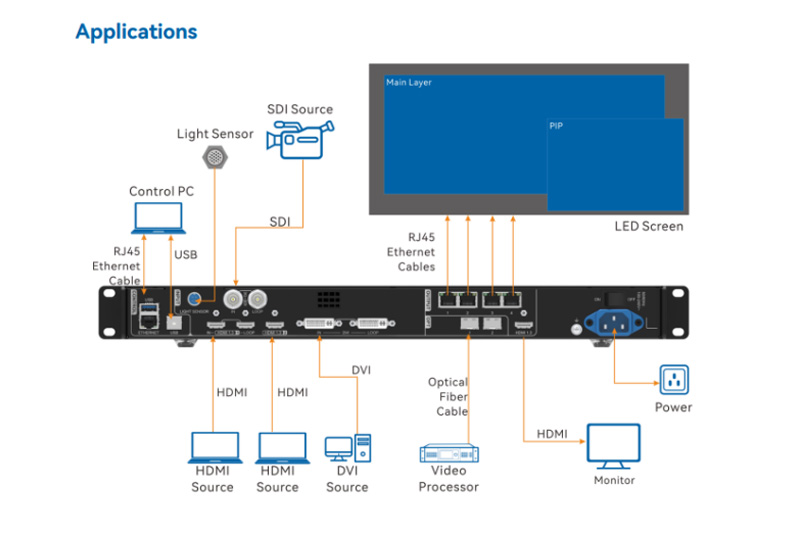
X6 is a professional control system and video processing equipment specially designed for LED engineering applications. It is shipped with various video signal interfaces, supports high-definition digital ports (DVI, HDMI, SDI) and their seamless switching, allowing broadcast quality scaling and multi-pictures display.


With 6 Gigabit Ethernet outputs, X6 supports LED display with maximum 8192 pixels in width or 4096 pixels in height. Also, used with a series of versatile functions for a flexible screen control and high-quality image display, X6 enjoys strong advantages in LED engineering applications.

LED Screen Controller Video Processor 01LED Screen Controller Video Processor 02

Product parameter list

X6-1 X4m X2m
1×SDI/1×HDMI1.4/2×DVI 2.6 milllon pixels
Up to 3840 pixels in width
Up to 2000 pixels in height
1 .3 million pixels
Up to 3840 pixels in width
Up to 2000 pixels in height
1920×1200@60HZ
1.4
6×1G Ethernet 2×HDMI1.4,1×DVI,1×CVBS,1×VGA USB×1 2×HDMI1.4,1×DVI,1×CVBS,1×VGA,USB×1
3.9 million pixels 1920×1080@60Hz 1920×1080@60Hz
✔ 4×1G Ethernet 2×1G Ethernet
✔ USB/RS232 USB/RS232
✔ Cropping, Scaling Cropping, Scaling
Cropping, Scaling, PIP, Switching 1 1
3 16 16
✔ ✔ ✔
✔ ✔ ✔
LED Screen Controller Video Processor 06 ✔ ✔
Latest Product

Check out our Product

View More
Hight Resolution Led Panel

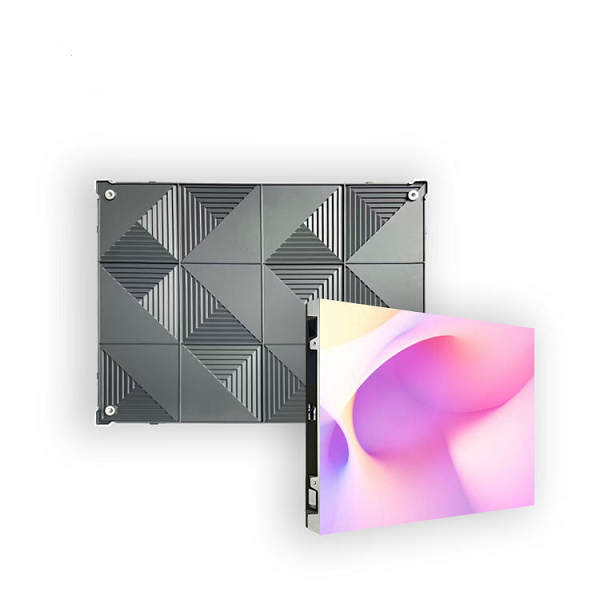
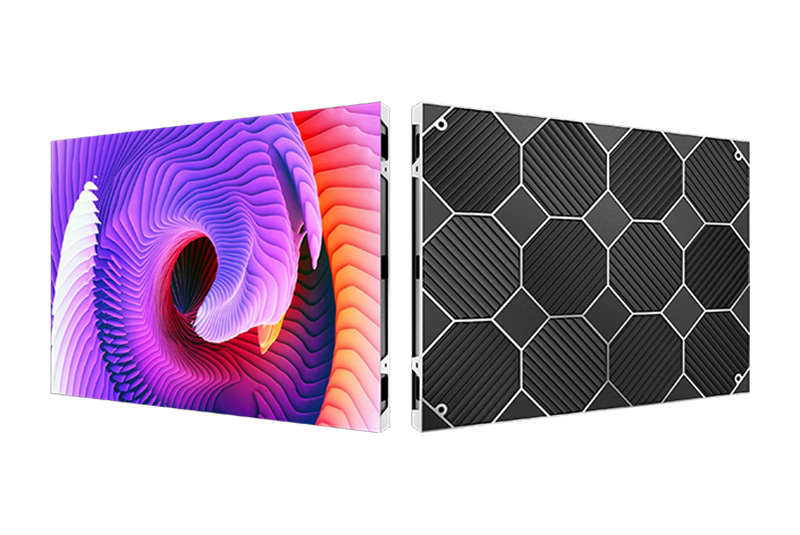
Fixed Installation LED Cabinet P1.8 Indoor LED Display

<p>P1.8 Fixed Installation LED Cabinet delivers ultra-HD indoor display with seamless splicing, high refresh rate, and reliable performance for conference rooms, control centers, and commercial spaces.</p> <p>Fixed Installation LED Cabinet P1.8 Indoor LED Display is an indoor fine-pitch LED display developed for close-viewing indoor video walls and high-detail display projects. It targets buyers comparing P1.8 indoor LED display options by application, installation method and published product specifications.</p> <p>lists Pixel pitch: 1.25mm | 1.53mm | 1.86mm | 2.5mm; Pixel density: 6400000 | 425000 | 288906 | 160000;</p> <p>Module Size(mm): 320*160; LED package: SMD1010 | SMD1212 | SMD1515 | SMD2020;</p> <p>Module resolution: 256×128 | 208×104 | 172×86 | 128×64.<br /> For a reliable project configuration, evaluate viewing distance, pixel pitch, cabinet flatness, resolution, refresh rate, installation depth and maintenance access. The final model and bill of materials should be confirmed against the installation drawing and operating conditions before production.</p>
Read More
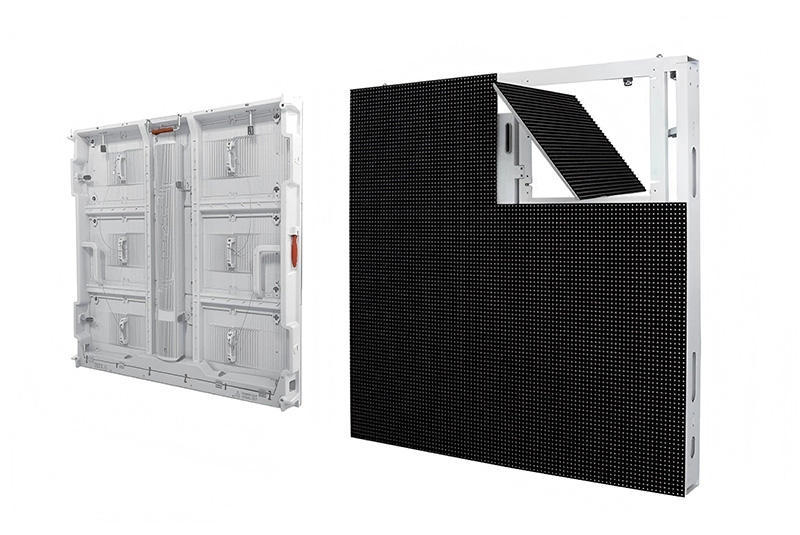
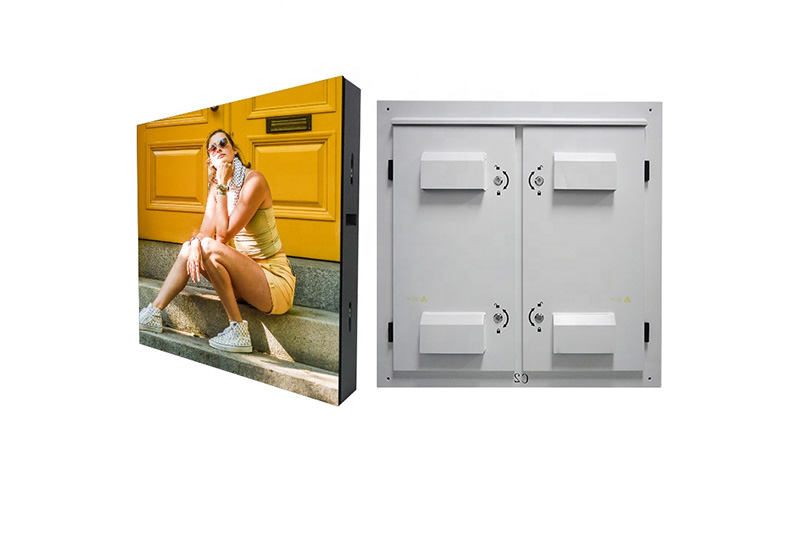
Outdoor energy-saving LED screen cabinet with front and rear service structure

Outdoor energy-saving LED screen

<p>Outdoor Energy-Saving LED Screen is designed for fixed outdoor advertising and commercial display projects that require high brightness, lower power consumption and reliable weather resistance.</p> <p>The 960x960mm aluminum cabinet supports front and rear service, IP66 waterproof protection and efficient heat dissipation.</p> <p>Buyers should confirm pixel pitch, brightness, cabinet size, maintenance method, control system and installation environment before quotation.</p>
Read More
led1

Indoor P1.25 HD Small Spacing LED Display Panel

<p>Indoor P1.25 HD LED Display Panel delivers ultra-clear images with seamless splicing, ideal for premium Small Pitch LED Display applications.</p>
Read More
Fixed Outdoor LED Display Billboard1

Outdoor P5 LED Display Billboard Fixed Installation

<p>Outdoor P5 LED Billboard with high brightness, IP65 protection, and fixed installation for reliable outdoor advertising displays.</p>
Read More
Latest News

Check out our blog posts

View More

25/ September

Sphere LED Displays for Immersive Spaces: Pixel Pitch, Content Mapping, and Maintenance Guide

A sphere LED display has no single front edge or rectangular canvas. Visitors can move around it while content must remain coherent across a continuously curved surface. For museums, retail atriums, exhibitions, and event centers, the key decisions are pixel pitch, sphere diameter, content mapping, structure, heat management, and service access. Longcheng’s P2.5 LED Creative Spherical Display page lists P1.875, P2, P2.5, P3, P4, and P5 options. Published brightness is 800 cd/m² across the listed models; refresh rate is 3840 Hz for P1.875 and P2, and 1920 Hz for P2.5 through P5. These values help frame the selection, but the final design still depends on sphere diameter, viewing distance, camera use, and the support structure.   Why Is a Sphere LED Display Harder to Plan Than a Flat Screen? A flat screen can be described by width and height. A sphere needs diameter, curvature, support geometry, and a surface-mapping strategy. Pixels near the equator and poles behave differently, so a normal rectangular video cannot simply be stretched over the surface without distortion. What Should Be Defined Before the Sphere Is Designed? Start with the intended viewing zone, sphere diameter, mounting height, whether people can walk all the way around it, and whether cameras will record it. Also define whether the content is decorative, informational, live video, or branded animation. These choices affect both pixel pitch and the complexity of the mapping system. How Should Pixel Pitch Be Selected for a Sphere LED Display? Pixel pitch should be matched to the closest meaningful viewing distance and the smallest content detail. Fine pitches can support close viewing, but they raise total pixel count and control-system load. Larger pitches reduce cost and processing demand when the sphere is viewed from farther away. Pitch Published Pixel Density Refresh Rate Typical Direction P1.875 284,444 px/m² 3840 Hz Very close indoor viewing P2 250,000 px/m² 3840 Hz Close viewing / camera-sensitive use P2.5 160,000 px/m² 1920 Hz Balanced indoor immersive display P3-P4 111,111-62,500 px/m² 1920 Hz Larger sphere or longer viewing distance What Does Sphere Diameter Do to Pixel Count? Diameter changes the amount of surface that must be covered and the number of pixels that the controller has to map. As a rough geometric check, a 1.5 m diameter sphere has an equatorial circumference of about 4.71 m. At P2.5, that circumference corresponds to roughly 1,884 pixel intervals around the equator; at P4, it is about 1,178. This is only an early estimate because the actual module geometry, pole treatment, and mapping layout determine the final canvas.   How Should Content Be Mapped Across a Spherical Surface? Sphere content should be prepared as a mapped surface rather than a normal flat rectangle. A 3D preview or UV-style mapping workflow lets the content team see how graphics wrap around the equator, converge toward the poles, and cross module boundaries. Which Content Types Work Best? Large moving textures, planetary imagery, abstract motion, and short brand elements usually adapt well because they tolerate distortion. Small text, long headlines, faces, and QR codes are less forgiving. If text is necessary, place it in controlled viewing zones.   Where Should Seams and Poles Be Tested? The poles and any main service seam deserve special attention because distortion and module geometry are most visible there. Run a full loop on the assembled sphere and walk around it at the intended audience distance. This is more useful than approving content on a monitor alone. What Maintenance Problems Are Easy to Miss? A sphere can look seamless but still be difficult to service. Internal frames, power supplies, receiving cards, ventilation, and cable paths all need access. The flexible soft-board construction still requires a defined removal path and safe bending limits for the exact module used. Replacement modules should be kept from the original production batch when possible. Color and brightness differences are more obvious on a continuous curved surface, especially when a new module sits beside older calibrated modules. The maintenance plan should also state how technicians reach the upper and lower sections without damaging neighboring tiles.   What Should Be Tested Before Handover? A factory or pre-installation test should cover color consistency, seam visibility, refresh behavior on camera, content synchronization, temperature, and the replacement of at least one serviceable module. If the sphere is suspended, confirm the complete structural load and the safety method before shipment. Longcheng’s related article on creative LED configurations describes spherical displays as useful for omnidirectional attractions where people circulate around the object. That makes a 360° walkaround test especially important: the image should remain coherent from multiple approaches, not only from one preferred camera angle. How Should Buyers Compare Sphere LED Display Quotes? Compare more than the module price. A complete quote should define sphere diameter, pixel pitch, surface coverage, processor capacity, internal frame, power distribution, installation, content mapping, spare modules, and service access. Quotes are not comparable if one includes mapping and structural work while another covers only LED modules. For a project based on the creative LED display range, ask for a drawing that shows module layout and service access before production. Shenzhen Longcheng Photoelectric Technology Co., Ltd. publishes the available spherical display pitches, but the final diameter, support frame, and content workflow should be confirmed for the actual site. Conclusion A sphere LED display succeeds when geometry, pixel pitch, content mapping, and maintenance are planned as one system. Choose the pitch from real viewing distance, estimate the pixel load from the sphere diameter, build content for a mapped 3D surface, and test seams, poles, camera behavior, and service access before handover. These steps reduce visual distortion, avoid control-system surprises, and make the installation easier to maintain over its operating life. FAQs Is P2.5 a Good Pixel Pitch for an Indoor Sphere LED Display? It can be a balanced choice for many indoor projects, especially when viewers are relatively close but the content does not require the density of P1.875 or P2. The final choice should still be checked against sphere diameter and viewing distance. Can Normal 16:9 Videos Be Used on a Sphere LED Display? They can be used as source material, but they normally need to be reformatted or mapped for the spherical canvas. Without mapping, important content may stretch, converge at the poles, or cross seams poorly. How Should Spare Modules Be Planned for a Spherical LED Screen? Keep compatible spares from the original order and record their model, batch, and calibration information. The quantity should reflect sphere size, service access, supplier lead time, and the cost of downtime. Title: Sphere LED Displays for Immersive Spaces: Pixel Pitch, Content Mapping, and Maintenance Guide Meta Description: Plan a sphere LED display by matching pixel pitch, sphere diameter, content mapping, maintenance access, and viewing distance for immersive spaces. Keywords: sphere LED display, sphere LED display for immersive spaces, sphere LED display content mapping
Read More
Sphere LED Displays for Immersive Spaces Pixel Pitch, Content Mapping, and Maintenance Guide

24/ September

How to Plan a Cube LED Display for 360° Retail and Event Experiences

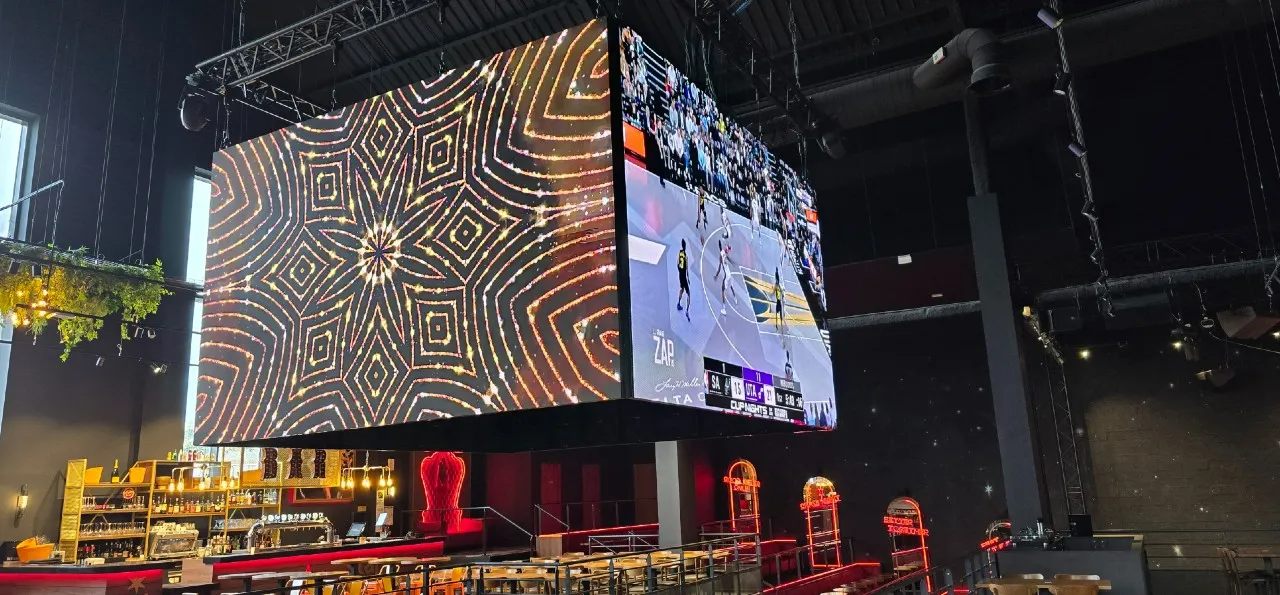
A cube LED display is most useful when people can approach it from more than one direction. In retail atriums, exhibition halls, pop-up activations, and event concourses, the display can turn a central or overhead position into a 360° digital focal point. The planning challenge is that four visible faces create four sightlines, more pixels, more content decisions, and more service points than a flat wall. A successful project therefore starts with audience movement and content behavior, not with the cube size alone. Longcheng’s Creative Cube LED Display is offered in P2.5, P3, P3.91, and P4 configurations, with published cube sizes from 320 × 320 × 320 mm to 512 × 512 × 512 mm. Those options are useful starting points, but the final choice still depends on viewing distance, active faces, mounting height, content detail, and maintenance access.   What Makes a 360° Cube LED Project Different from a Flat Screen? A flat LED wall has a clear front. A cube does not. Viewers may approach from four directions, stop at different distances, or see two faces at once from a corner. That changes the way the screen should be sized and the way content should be built. How Many Faces Should Actually Be Active? Four vertical faces are usually the most practical starting point because they match the main approach directions. A top face often has little audience exposure, while a bottom face only adds value when visitors can see beneath the installation. Map pedestrian flow first, then activate only the surfaces that earn meaningful exposure.   How Should Cube Size and Pixel Pitch Match the Experience? The best specification balances physical presence with the nearest realistic viewing distance. A compact retail feature may need a finer pitch because shoppers can stand close to it. A larger event cube mounted high above the floor can use a coarser pitch because the audience sees it from farther away. Configuration Typical Use Planning Effect P2.5 / 320 mm Close retail viewing, compact exhibit features Higher pixel density; more detailed content P3 / 384 mm Indoor directional viewing Balanced physical size and pixel load P3.91 / 500 mm Larger event or atrium feature Longer viewing distance; larger visual object P4 / 512 mm Higher mounting or distant viewing Lower density with lower processing demand Pixel pitch should not be chosen by headline resolution alone. Text size, camera use, audience distance, and the content style all matter. A high cube showing large brand graphics can look convincing with a different pitch from a low cube showing product details or directional information. How Should Content Be Mapped for a 360° Experience? Content design determines whether the cube feels like one spatial object or four small screens joined together. The content team should receive a face-by-face pixel map before campaign production begins. Should the Faces Be Independent, Mirrored, or Wrapped? Independent faces work when each approach direction needs a different message. Mirrored content is easier when the same message must remain visible from every side. Wrapped animation creates the strongest 360° effect, but it needs careful edge alignment so logos, faces, and text do not split at corners.   Why Do Corners Need Special Design Rules? Visitors often see two faces at once, so corner seams become part of the visual experience. Keep small text away from edges, test motion direction around the cube, and review the content from real walking paths rather than only on a flat desktop preview. Repeated loops should also be checked for timing drift if several outputs or content zones are involved. What Installation Details Matter Most in Retail and Event Sites? A 360° cube concentrates structure, power, data, and maintenance into a compact volume. Suspended units need structural approval for the complete load, while floor-mounted units need a stable base and protection from accidental contact. Recent AVIXA installation guidance emphasizes that LED projects should be specified around environment, viewing distance, brightness, pixel pitch, serviceability, power, and structure before the equipment is installed. For a cube, that means the drawing should show lifting points, cable exits, ventilation paths, and how a technician will remove a failed module or power supply without dismantling the whole object.   How Can Retailers and Event Teams Measure Whether the Cube Works? Visual novelty is not an ROI metric. Retail teams can track dwell time, store-entry rate, promotion scans, campaign sales, and content-change labor. Event teams can track sponsor exposure, photo interactions, and hardware reuse across shows. The most useful comparison is against the alternative. A cube may justify its cost when it replaces recurring printed graphics, creates additional sponsor inventory, or improves visibility from several traffic directions at once. If the same result could be achieved with one flat screen, the extra faces may not earn their cost. What Should Buyers Confirm Before Production? Before production, confirm cube dimensions, active faces, pixel pitch, face resolution, mounting height, support method, power demand, control-system capacity, and the service route. An assembled test is useful because corner alignment and cross-face color consistency are difficult to judge from separate panels. For projects based on the Creative LED Display range, product-specific limits and the final service plan should be checked against the project drawing. Shenzhen Longcheng Photoelectric Technology Co., Ltd. publishes the product information, but the final bill of materials still needs to match the actual venue and operating conditions. Conclusion Planning a cube LED display for a 360° retail or event experience starts with audience routes, not the catalogue. Decide which faces people can actually see, choose size and pixel pitch from real viewing distances, build content around corner behavior, and lock the structural and maintenance plan before production. When these decisions are made together, the cube becomes a usable multi-directional media surface rather than an expensive shape that is difficult to operate. FAQs Is a Smaller Pixel Pitch Always Better for a Retail Cube LED Display? No. A finer pitch helps with close viewing and small details, but it also raises pixel count, processing demand, and cost. Choose it only when the nearest viewers and content justify the extra density. Can Each Face of a Cube LED Display Show Different Content? Yes, if the processor, mapping, and content workflow are designed for independent outputs. Mirrored content is simpler, while wrapped animation needs the most careful corner alignment and previewing. What Information Is Needed for an Accurate Cube LED Display Quote? Provide the required cube size, active faces, nearest viewing distance, mounting height, indoor or event environment, content sources, operating hours, service access, destination, and completion date. Title: How to Plan a Cube LED Display for 360° Retail and Event Experiences Meta Description: Plan a cube LED display for 360° retail and events by choosing active faces, pixel pitch, content mapping, installation, and service access. Keywords: cube LED display, cube LED display for retail and events, cube LED display content mapping
Read More
How to Plan a Cube LED Display for 360° Retail and Event Experiences

18/ September

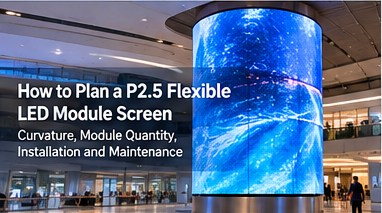
How to Plan a P2.5 Flexible LED Module Screen: Curvature, Module Quantity, Installation and Maintenance

A P2.5 flexible LED module can follow columns, waves and surfaces that rigid cabinets cannot cover smoothly. Flexibility shifts the critical work to radius control, frame accuracy, alignment, heat dissipation and front-service access. Ordering modules before confirming the structure can produce visible seams, distortion or inefficient maintenance. AVIXA describes flexible LED screens as displays that can conform to curved surfaces, while also advising buyers to include mounting, content management, installation and maintenance in the budget. This is a useful starting point for any flexible LED display project: the module price is only one part of the installed system.   Which Site Measurements Must Be Confirmed First? Create an accurate drawing or 3D survey. Record width, height, radius at several points, curve direction, access depth, structural material, ventilation and nearest viewing position. Do not estimate irregular architecture from one measurement: small frame errors repeat across rows and become obvious at the final seam. How Do Pixel Pitch and Viewing Distance Affect the Plan? The Indoor P2.5 Flexible LED Module page lists P2, P2.5 and P3 configurations. Published module sizes are 320 × 160 mm for P2 and P2.5, and 240 × 120 mm for P3. It also lists 800 cd/m² brightness and refresh options of 3840 Hz for P2 and 1920 Hz for P2.5 and P3. The final choice should be checked against real content and camera use. P2.5 may be a balanced option for indoor commercial viewing, but P2 can justify its higher pixel load when viewers stand very close or need to read fine text. Why Must the Minimum Bend Radius Be Verified? “Flexible” does not mean unlimited bending. The safe radius depends on the PCB, silicone base, component layout and installation method. Obtain the minimum concave and convex radius, allowed bending direction and fastening pattern for the exact model. Operating at the limit leaves less tolerance for frame errors and servicing.   How Do You Calculate Module Quantity and Resolution? For a simple rectangular curved surface, calculate the developed surface width along the arc, not the straight chord between its ends. Divide the developed width by module width and the display height by module height, then round to whole modules. Multiply the two results to obtain the active quantity. Add project-specific spares separately; they should not be counted as active area. What Does a Practical P2.5 Example Show? Consider a developed surface measuring 3.20 m wide and 1.60 m high. With 320 × 160 mm P2.5 modules, the layout requires 10 modules across and 10 modules high, or 100 active modules. A P2.5 module of this size contains 128 × 64 pixels, so the finished canvas is 1,280 × 640 pixels. If the physical arc does not divide exactly into 320 mm increments, adjust the structure or display boundary before fabrication rather than trimming a module on site.   Planning Item Calculation Example Result Columns 3,200 mm ÷ 320 mm 10 Rows 1,600 mm ÷ 160 mm 10 Active modules 10 × 10 100 Native resolution (10 × 128) × (10 × 64) 1,280 × 640 How Does the Curve Change Content Design? A curved canvas changes apparent proportions from different viewpoints. Test logos, text and faces from the main audience positions. Keep critical information away from the closing seam of a cylinder and from areas seen at extreme angles. Content should be previewed on the real geometry or a reliable simulation, because a flat desktop proof cannot reveal every distortion. What Installation Details Prevent Visible Defects? The product page describes a soft silicone module with embedded magnets and no conventional metal cabinet. Magnetic mounting can simplify front installation, but the steel surface still needs consistent curvature and flatness. Test magnet position, cable clearance and removal force on a sample. A flexible module follows an inaccurate frame; it does not correct one. How Should Power, Data and Heat Be Managed? Design power and data zones from the final module matrix. Confirm module voltage, maximum current, scan mode, receiving-card output groups and the approved load per power supply under the expected temperature. Leave service loops that do not press against the PCB when it bends. Ventilation paths must remain open, particularly inside a column where power supplies and receiving cards can concentrate heat. What Does a Documented Flexible-Display Case Show? A documented Qatar Ministry of Environment and Climate Change installation used three flexible GOB screens at P1.56, including sizes of 9,920 × 2,400 mm, 5,120 × 2,400 mm and 1,600 × 2,880 mm. This was not a Longcheng project and uses a different pitch, but it demonstrates a transferable point: the project specified pitch, exact dimensions, curvature and protective treatment as one system. A P2.5 project should follow the same discipline instead of treating the soft module as an isolated component.   How Should Maintenance and Lifecycle Cost Be Controlled? Front access is valuable only if a technician can remove a module without damaging its neighbors or overstressing the curve. Conduct a mock replacement before shipment. Label module positions, receiving cards, power zones and data paths. Store calibration files and keep compatible spare modules from the original batch, because LEDs and driver components can change over time and later replacements may not match visually. Which Costs Belong in the Budget? Include the modules, custom frame, survey, processor and controller, power distribution, magnetic mounting surface, installation labor, access equipment, calibration, spare parts and content adaptation. Add the cost of closing a retail area or hiring a lift for maintenance. Compare a flexible solution with faceted rigid cabinets: flexible modules may cost more, but they can avoid visible polygon edges and bulky structures on a tight radius. The better ROI depends on visual requirements and service conditions, not on module price alone. How Can Buyers Reduce Failure and Downtime Risk? Approve a sample curve before mass production and test it through repeated installation, operation and removal. Define incoming-inspection tolerances for size, connectors, brightness and color. Keep a documented reserve through the LED display modules category and ensure replacements match the original model, batch and calibration. For a revenue-generating screen, a small spare stock normally costs less than emergency international shipping and prolonged downtime. Conclusion Planning a P2.5 flexible LED module screen requires more than choosing a pitch and total area. Confirm the developed dimensions, safe radius, module matrix, native resolution, supporting-frame tolerance, magnetic layout, power and data zones, thermal path and front-service procedure before production. A sample curved section and mock maintenance test can expose problems while they are still inexpensive to fix. These checks protect image quality, control installation labor and make lifecycle costs more predictable. FAQs Can a P2.5 Flexible LED Module Form Any Radius? No. Every model has mechanical limits. Obtain the minimum concave and convex radius and fastening instructions for the exact module before designing the frame. How Many Spare Modules Should Be Ordered? There is no universal percentage. Base the reserve on active quantity, failure impact, site access, supplier lead time and the cost of downtime, and buy matching batch stock with the original order. Can Flexible Modules Be Installed Directly on a Wall? Only when the mounting surface meets the required curvature, flatness, strength, ventilation and service-access conditions. A surveyed support frame is safer than an uneven architectural surface.
Read More
How to Plan a P2.5 Flexible LED Module Screen_ Curvature, Module Quantity, Installation and Maintenance

17/ September

How Do You Plan a Cube LED Display? Screen Size, Content Mapping, Installation and Cost

A cube LED display can turn unused overhead or central-floor space into a multi-directional digital canvas. Its commercial value, however, does not come from the shape alone. Buyers must coordinate viewing distance, active faces, content resolution, structural support, heat management and service access before production. A cube that looks impressive in a rendering can become expensive to install or difficult to maintain if these decisions are postponed. AVIXA notes that LED signage usually requires a higher initial investment than printed signage and recommends budgeting for mounting infrastructure, content management, installation and ongoing maintenance—not only the display hardware. The same source identifies avoided reprinting, reusable hardware and sponsor inventory as potential returns. These points are especially relevant to a multi-face creative LED display, because every additional face adds pixels, content work and service considerations. What Must Be Defined Before Selecting a Cube LED Screen? Start with the site and business objective rather than a catalogue size. A suspended cube in an exhibition hall has different structural and sightline requirements from a floor-mounted unit in a retail atrium. Record the nearest and farthest viewers, mounting height, available power, operating hours, content source, access restrictions and whether cameras will record the screen. How Many Faces Should Be Active? Four active vertical faces suit many suspended applications because visitors approach from different directions. A fifth top face is often invisible, while a bottom face matters only when viewers can stand beneath the installation. Paying for unseen faces raises module, controller and power costs without improving communication. Map pedestrian paths first, then activate only the surfaces that have measurable exposure. Which Cube Size and Pixel Pitch Fit the Site? Longcheng’s Creative Cube LED Display lists P2.5 at 320 × 320 × 320 mm, P3 at 384 × 384 × 384 mm, P3.91 at 500 × 500 × 500 mm and P4 at 512 × 512 × 512 mm. These sizes are useful starting points, not automatic prescriptions. A smaller pitch supports closer viewing and finer text, but it also increases pixel count and processing demand. At longer distances, a larger pitch may deliver comparable perceived detail at a lower cost.   Configuration Typical Decision Logic Main Cost Effect P2.5 / 320 mm Close viewing; compact retail or exhibit feature Higher pixel density and content detail P3 / 384 mm Balanced size for indoor directional viewing Moderate processing and structure P3.91–P4 / 500–512 mm Longer viewing distance; larger visual object Lower density, but more physical area How Should Content Be Mapped Across Multiple Faces? Content planning should begin before the processor and cabinet layout are frozen. The designer must decide whether each face shows an independent message, all faces mirror the same feed, or one animation wraps around the cube. Independent feeds need more input management. Mirrored content is simpler but may waste the geometry. Wrapped animation produces the strongest spatial effect, yet poor corner alignment can split logos, faces or text. What Should the Content Team Receive? Provide a face-by-face pixel map, safe zones near each edge, the orientation of every face and a preview template showing the assembled cube. Build campaign files at native resolution whenever possible. Avoid placing small text across a corner, and test motion direction from actual audience routes. A 10-second loop should also be checked for synchronization after repeated playback, not only during a single preview. Why Do Corner Alignment and Calibration Matter? The eye compares adjacent faces at the edges, so brightness or color differences that seem minor on separate panels become obvious on a cube. Factory calibration should be followed by assembled testing. The acceptance process should examine corner seams, grayscale consistency, white balance, refresh behavior on camera and whether replacement modules retain usable calibration data.   How Should Installation and Maintenance Be Planned? A cube concentrates weight and cabling into a small structure. Suspended installations require engineering approval for the complete load, including cabinets, frame, power equipment, cables and safety hardware. Floor-mounted units need a stable base, controlled public access and protection against impact. The installation drawing should show lifting points, cable exits, ventilation paths and the sequence for removing each serviceable part. What Does a Real Digital-Signage Project Teach? The Minneapolis–St. Paul International Airport signage programme is not a Longcheng cube project, but it provides a useful operational lesson. Its centrally managed display network was designed so messages from different sources could be placed across assets when needed. AVIXA’s project account also reports more than 800 flat panels in the broader airport footprint. The lesson for a cube is that hardware becomes more useful when content ownership, scheduling and emergency-message rules are defined as part of the system—not after installation. How Can Service Access Reduce Downtime? Confirm whether modules, receiving cards and power supplies can be reached without dismantling the entire object. Keep labelled spare modules from the original production batch because later replacements may show color differences. A written service and repair plan should identify safe access equipment, fault-isolation steps, spare quantities and response responsibilities. For a suspended cube, the cost of a lift and site closure can exceed the price of the failed component.   What Should Be Included in the Cost and ROI Model? Compare total ownership cost over the intended operating period. Include LED faces, internal frame, mounting or suspension, processor capacity, media player, power distribution, installation labor, access equipment, content adaptation, calibration, spare parts, electricity and scheduled maintenance. Also price the operational consequence of downtime. The cheapest hardware quotation may be the most expensive option if routine repairs require removing the full cube. Which Metrics Can Show Whether the Cube Works? Set baseline and post-installation measures that match the location. Retail teams can track dwell time, entry rate, promotion scans and campaign sales. Event operators can track sponsor inventory, content-change labor and reuse frequency. Wayfinding applications should measure repeated questions or missed directions. ROI is strongest when the cube replaces recurring print and labor costs or creates saleable media inventory; visual novelty alone is not a financial result. Conclusion A successful cube LED display begins with audience routes and measurable communication goals. Select the active faces, physical size and pixel pitch together; then lock the face resolutions, corner-safe content template, structural design, power layout and maintenance route. Ask for an assembled factory test and a complete bill of materials before shipment. This sequence controls installation surprises, protects uptime and makes the final cube easier to operate across repeated campaigns. FAQs Is a Smaller Pixel Pitch Always Better for a Cube LED Display? No. A finer pitch is valuable for close viewing and detailed content, but it raises pixel count and system cost. Choose it only when the viewing distance and content justify the difference. Can Every Face Show Different Content? Yes, if the controller, processor and content workflow are designed for independent outputs. Mirroring one source is simpler and may reduce production workload. What Information Is Needed for an Accurate Quotation? Provide the cube size, active faces, mounting height, viewing distance, indoor conditions, content inputs, operating hours, service access, destination and required completion date.
Read More
How Do You Plan a Cube LED Display_ Screen Size, Content Mapping, Installation and Cost

11/ September

Can You Add a Transparent LED Film Screen to Existing Storefront Glass?

A storefront window must attract attention without hiding the merchandise behind it. A transparent LED film screen can add digital advertising to existing glazing, but suitability depends on the glass, daylight conditions, service access, and complete installed cost. This guide explains the practical checks, what published evidence shows, and how to estimate the additional purchases needed to recover an investment. Is Your Existing Glass Suitable for LED Film? Treat the window as part of the display system. A survey should establish what the glass is made of, how it is used, and where the electrical equipment will sit before an order is placed. Glass Condition and Surface Compatibility Record the pane dimensions, glazing type, existing coatings, tint, and any applied window films. Inspect for cracks, scratches, condensation, and damaged seals. Adhesion and visual performance must be checked against the selected product’s installation instructions; “suitable for glass” does not mean compatible with every coated surface. Ask the installer and glazing supplier to review the proposed application where necessary. A sample installation can reveal reflections, visible wiring, surface irregularities, or an unsuitable bond before the full window is covered. Do not assume that a film can be removed and reused without damage. Fixed Panes and Moving Doors Fixed glazing usually offers a simpler starting point than a frequently opened door. Moving sections introduce cable movement, connector strain, and potential interference with hinges or handles. Door applications require an explicitly approved design, not an improvised extension of a fixed-window installation. For any Transparent LED Film Screen, request a pane-by-pane drawing showing the mounting method, connections, and clearances. Confirm approved glass surfaces and operating conditions for the exact configuration quoted. Will the Advertising Remain Clear Through the Window? A transparent display must balance two competing goals: making the message visible and preserving the view into the store. Evaluate both from the pedestrian’s position, not just from a close-up showroom demonstration. Daylight and Interior Visibility Sunlight, reflections, tinted glass, and interior lighting all affect the result. Test a sample during the brightest operating period and after dark. A display that looks convincing in a dim demonstration room may struggle behind reflective street-facing glazing. Ask how transparency is measured and whether the figure includes connectors and other visible components. Higher transparency alone does not guarantee better advertising. Conversely, maximum brightness is not always desirable when customers stand nearby or when the display operates at night. Pixel Pitch and Campaign Design Choose pixel pitch around the smallest important content element and the actual viewing distance. Large product silhouettes and brief messages are more forgiving than price lists, fine lettering, and QR codes. Test those difficult elements before approving the layout. Dense, bright backgrounds can dominate the merchandise behind them. Leave open areas and use short messages. This transparent-screen structure comparison covers cabinet-style alternatives, whose specifications should not be transferred to adhesive film. A 2021 peer-reviewed retail eye-tracking study analyzed valid gaze data from 46 of 50 participants. In its virtual service-area scene, the media screen had the highest mean dwell time among analyzed elements, approximately 2.55 seconds. This was not a transparent-film sales trial. The result supports testing where attention goes, but cannot establish a sales increase from installing LED film. Measure attention and purchasing separately. What Does a Retrofit Installation Need? The film still needs power supplies, controllers, cables, and service access. These components determine whether a retrofit remains tidy and maintainable. Power, Cabling, and Equipment Location Agree on cable routes before finalizing the visible display area. Identify where power supplies and controllers can be secured, ventilated, and reached without disturbing merchandise. Keep connectors away from routine window-cleaning activity and protect cables against accidental pulling. A qualified installer should size the electrical supply using the manufacturer’s maximum load and applicable installation requirements. Do not use average advertising consumption as the sole basis for circuit sizing. Confirm operating temperatures, heat exposure, and whether the product is approved only for installation behind glass rather than outdoors. Film Layout and Installation Access Match the layout to individual panes, mullions, and access restrictions. Leave required clearances around edges and connection points. Curved glass, unusual pane shapes, or partial-window coverage need product-specific drawings. Never assume that LED film can be trimmed anywhere like ordinary decorative vinyl. Plan installation outside busy trading periods. The handover should include the panel layout, wiring map, content dimensions, operating instructions, and approved cleaning method. Ask which faults can be repaired locally and which require removing a larger section. How Should You Compare Costs and Suppliers? The price of the film alone is not the project cost. Compare complete proposals with the same display area, content requirements, installation conditions, and service commitments. Whole-Project Costs and a Pilot Test Include control equipment, power supplies, installation labor, electrical work, cable concealment, content preparation, freight, and spare components. Ask about removal and replacement costs as well as the warranty. A lower initial quote can become expensive if routine servicing requires substantial dismantling. For a multi-store rollout, begin with one representative window. Track display uptime, content-update effort, repair needs, and customer visibility into the store. Compare commercial results cautiously: seasonal promotions, location, and foot traffic also influence sales. No display specification alone guarantees a revenue increase. A Three-Year Payback Test For illustration only, assume installation costs $6,000 and annual energy, maintenance, and content costs total $1,400. Recovering capital over three years requires $2,000 annually, bringing the yearly target to $3,400. At $2 contribution per additional transaction, that means about five additional purchases daily across 365 operating days. These are assumptions, not product specifications or promised returns. Replace them with local costs and contribution after variable costs; financing and taxes are excluded. A Real Store Case—and Its Limits A 2021 report on Abierto’s Café Nouria trial described LG transparent LED film at a Maine convenience store. The supplier reported positive shopper responses and spontaneous purchases while preserving employees’ view toward fuel pumps and parking. The report provided neither a sample size nor quantified sales uplift. This is a third-party installation, not a Longcheng customer case. Its transferable lesson is to define essential sightlines before choosing the advertising area, not to assume a particular financial return. Conclusion Approve glass compatibility, daylight readability, wiring, and repair access before purchasing. Then evaluate the investment against a measurable commercial threshold. A smaller, serviceable installation that preserves the window’s merchandising role can be preferable to maximum coverage with untested returns. FAQs Can LED Film Be Installed on Any Glass? No. Surface coatings, glass condition, curvature, and the manufacturer’s mounting requirements can affect suitability. Confirm compatibility for the actual pane before installation. Can a Transparent LED Film Screen Be Used Outdoors? Only if the exact product is approved for that exposure. A screen visible from outdoors may still require a protected indoor installation behind glass. Can Existing Advertising Videos Be Reused? Often, but they may need a new canvas size, larger text, and simpler backgrounds. Test the finished content at the intended viewing distance before launch.
Read More
Can You Add a Transparent LED Film Screen to Existing Storefront Glass

10/ September

How to Choose an LED Video Processor for Your LED Wall

Excellent LED panels can still show cropped slides, soft text, or blank images when the control equipment is poorly matched. Choosing an LED video processor starts with the native pixel canvas, signal formats, and operating routine. This guide combines technical checks, a real touring example, and an illustrative cost comparison to help buyers specify a system they can install, operate, and recover reliably. What Must the Processor Do in Your System? Start by defining the signal path. Different products combine different functions, so a device described as a controller may not offer the same image-processing features as another model with a similar name. Processing and Sending Functions A video processor can scale, crop, position, or switch supported video sources. A sending controller delivers the resulting image data to compatible receiving cards in the LED cabinets. An all-in-one unit combines these roles, potentially reducing the number of separate devices and connections. The LED screen controller and video processor range lists X2M, X4M, and X6 models. Treat these as a shortlist, not proof of identical capabilities. Request the current datasheet for the exact model, hardware version, and firmware quoted. Everyday Operating Requirements A meeting-room screen may need reliable laptop input and straightforward source switching. An event wall may require multiple sources, rehearsed presets, and predictable transitions. A retail installation might prioritize unattended playback and recovery after power interruptions. Describe these workflows before selecting hardware. Ask which functions belong to the processor itself and which require an external media player, switcher, or computer. This avoids paying for duplicated features or discovering that an essential function is missing after installation. How Much Pixel Capacity Does the Wall Need? Physical screen area is not enough to size a processor. Calculate the native pixel canvas from the confirmed cabinet layout and module resolution, then compare it against every relevant output limit. Calculate the Native Canvas Multiply the number of cabinets across by each cabinet’s horizontal resolution. Repeat vertically, then multiply the resulting width and height to obtain the total pixel count. For example, a wall with 20 cabinets across and 10 high, each containing 128 by 128 pixels, produces a 2,560 by 1,280 canvas. Its total is 3,276,800 pixels. This is an illustrative calculation, not a capacity claim for any of the listed controllers. For another cabinet-based example, see Longcheng’s P3.91 panel-count and resolution guide. Always use the actual cabinet specification rather than assuming every panel with the same nominal pitch has identical dimensions. Check Width, Height, and Port Limits Total loading capacity is only one limit. A processor may also restrict maximum output width, maximum height, and the pixels carried by each output port. A very wide banner can therefore fail a width limit even when its overall pixel count appears acceptable. Request a port-by-port loading plan showing cabinet connections and receiving-card assignments. Confirm the supported frame rate and bit depth under that configuration. Do not treat published maximum width and maximum height as a rectangle that the device necessarily supports simultaneously. Does a 4K Input Guarantee a Native 4K Wall? No. Input compatibility, processing capability, and output loading capacity describe different parts of the system. Confusing them is an easy way to buy an undersized controller. Input Resolution Versus Physical Pixels A 4K UHD image contains 3,840 by 2,160 pixels, or 8,294,400 pixels in total. A processor might accept that source and scale it onto a lower-resolution wall. Accepting the signal does not create additional physical pixels or prove that the controller can drive a full native 4K canvas. Conversely, a wall with enough pixels still needs a supported signal path and suitable processing. Specify whether the project requires pixel-for-pixel reproduction, scaled video, or multiple independent content regions. Fine text and spreadsheets deserve particular attention because scaling can reduce legibility. Match the Complete Input Format List every source device and its intended resolution and frame rate. Confirm connector versions, supported timings, and content-protection compatibility where relevant. A familiar connector shape alone does not establish support for the required signal. Test the actual laptop, media player, or production switcher before handover. Check cold starts, reconnection, source changes, and the expected audio route. These ordinary operating situations often reveal problems that a static demonstration image will not show. Which Compatibility and Reliability Checks Matter? The processor must work with the receiving cards, display configuration, and operating workflow. Evaluate the complete control system rather than choosing each component independently. Receiving Cards and Configuration Files Confirm the supported receiving-card models, firmware requirements, scan configuration, and calibration workflow. Similar-looking network ports do not mean different control ecosystems are interchangeable. Cabinet mapping and screen configuration files should be saved and included in the handover package. Inventory compatible LED display accessories and spares. Obtain a tested combination rather than assuming every accessory will work with the controller. Include replacement lead times and configuration-restoration steps in the handover record. Recovery, Backup, and Acceptance Testing For important events, distinguish signal-path backup from processor backup and source backup. A redundant cable cannot protect against every controller fault. Document what each backup arrangement covers and rehearse how operators switch to it. Acceptance testing should use the final cabinet map, actual sources, detailed text, moving video, and representative operating brightness. Where cameras are involved, test the complete display on camera; the processor alone cannot guarantee flicker-free results. Record the approved settings so the installation can be restored consistently. What Can a Touring Case Teach Buyers? Field projects can reveal requirements that a headline resolution misses, especially when different LED products share a show. In its case study of The Smile’s 2024 tour, Brompton describes Universal Pixels using SX40 processing with ROE V4ST panels and 10G data distribution. ROE LED Strip used a T1 processor selected for interpolation functionality. The supplier reports successful integration of newer panels and established strip products. This is a third-party installation, not a Longcheng project; no quantified downtime or financial return is provided. The practical lesson is to prioritize display-specific functionality and compatibility, not only pixel capacity. How Can You Compare Ownership Costs? Compare hardware, sending equipment, adapters, backup devices, commissioning, training, and support. Operator time can justify a price premium, but it must be measured. An Illustrative Labor-Saving Calculation Assume a processor costs $1,200 more but saves one setup hour for two technicians paid $40 per hour across 20 events annually. The assumed saving is $1,600 yearly, giving a simple payback of nine months. At half that time saving, payback becomes 18 months. These are hypothetical figures, not measured product performance. Test the workflow with your operators and include additional recurring costs before claiming a return. Conclusion Choose an LED video processor by matching the native canvas, input formats, output-port plan, and receiving-card ecosystem. Verify width and height limits separately from total pixels, and distinguish 4K input support from native 4K output. A documented, tested configuration is more valuable than a headline specification because it gives installers and operators a system they can commission, use, and maintain confidently. FAQs Can One Processor Control Several LED Screens? Possibly, if its mapping functions, outputs, and total capacity support the proposed layout. Independent content on each screen may introduce additional requirements. Is the Controller With the Most Pixels Always Best? No. Input compatibility, port allocation, operating features, and support matter too. Extra capacity is useful only when the rest of the configuration fits. Should the Processor Be Ordered With the LED Panels? Buying a tested package can simplify compatibility checks and commissioning. Existing equipment may also be suitable, provided the supplier verifies the complete configuration first.  
Read More
How to Choose an LED Video Processor for Your LED Wall

Our Brand

Colorlight logo
G-ENERGY
kinglight
Mean well
nationstar
Nova
Rayshine
Home
WhatsApp
Email
Contacts