Nullam dignissim, ante scelerisque the is euismod fermentum odio sem semper the is erat, a feugiat leo urna eget eros. Duis Aenean a imperdiet risus.

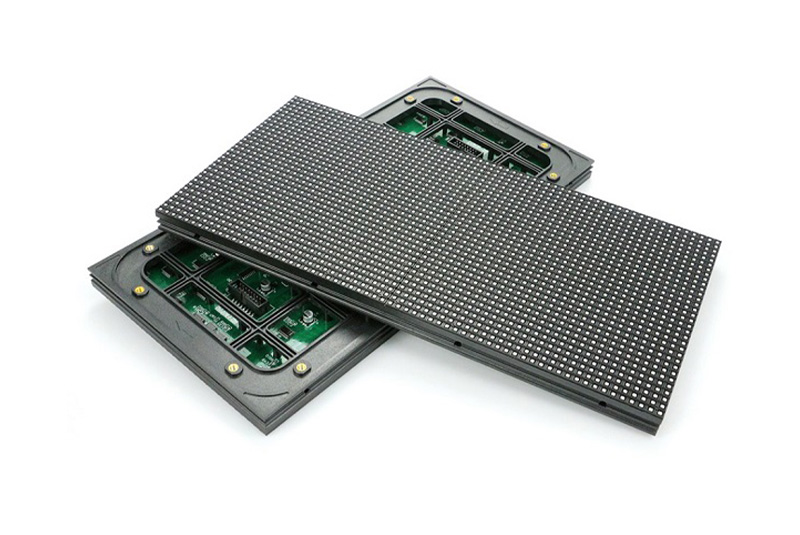
Outdoor P5 LED Module size 320x160mm1030

Outdoor P5 LED Display Module Size 320x160mm With High Brightness LED Screen Display

<p>Pixel Pitch: P3.076,P4,P5,P8,P10<br /> Brightness: 4000-8000CD<br /> Advertising Publish, Retail Store, Shopping Mall,Welcome Display,Self-service business,Exhibition Hall,Air port,Subway,Restaurant,Hotel Suppliers</p>
Read More
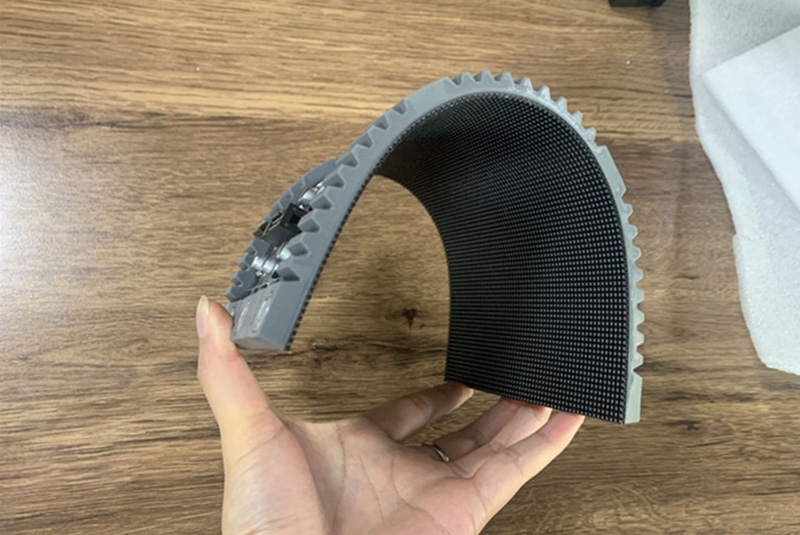
Indoor p2.5 Flexible LED Module1110

Indoor p2.5 Flexible LED Module

<p>Pixel Pitch: P2,P2.5,P3,P4<br /> Brightness: 800CD<br /> Usage:indoor installation for hotel, meeting room, schoole media room</p>
Read More
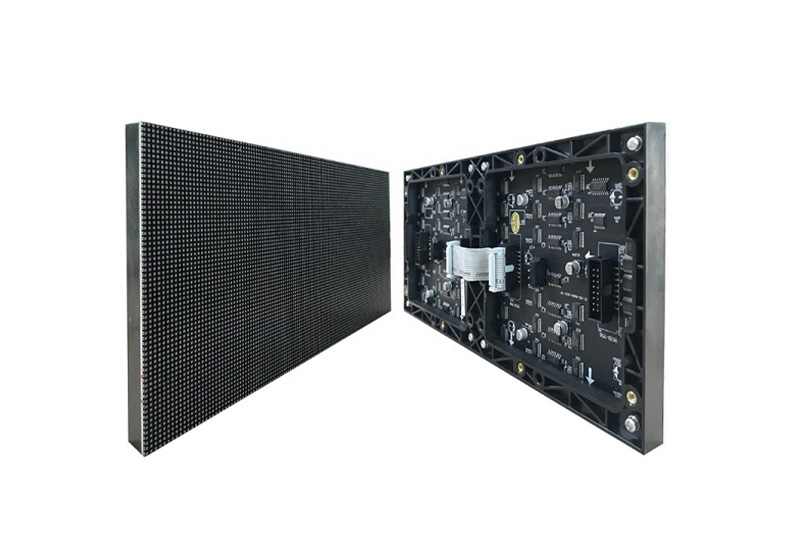
Indoor P2 LED Display Module 1

Indoor P2 LED Module High Definition Fine Pitch LED Display Module For Screen

<p>Indoor P2 LED Display Module delivers high-definition images with flexible design for customized LED video wall solutions.</p> <p>Pixel Pitch: P2,<br /> Brightness: 800CD<br /> The product type:Indoor fixed series LED display</p>
Read More
Applications

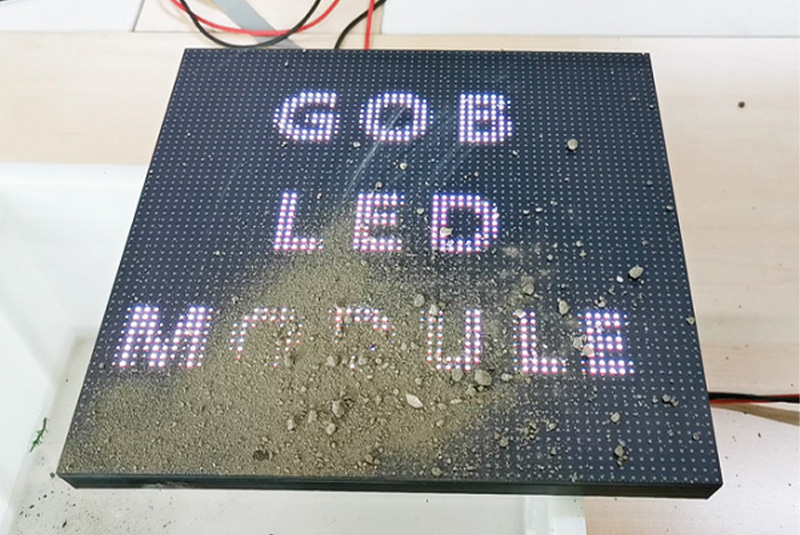
Indoor GOB LED Module High Protection LED Display Module For Fine Pitch Screen

<p>GOB LED Module provides high protection, waterproof performance, and HD visuals for fine pitch indoor LED display applications.</p> <p>Full Color IP57 GOB Small Spacing LED Display<br /> Pixel Pitch: P1.25, P1.875, P2, P2.5<br /> Brightness: 800nits<br /> Refresh Rate: 1920Hz-3840Hz</p>
Read More
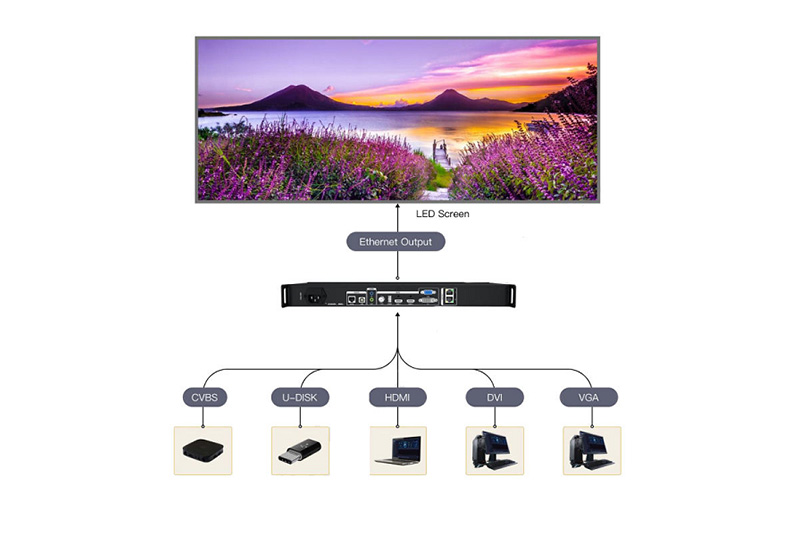
Connection

LED Screen Controller Video Processor

<p>Model: X2M,X4M, X6<br /> All-in-One Controller</p>
Read More
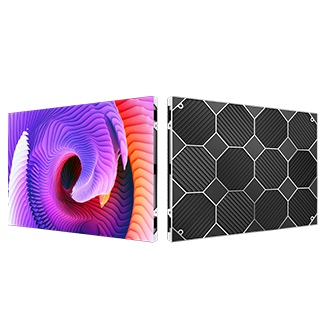
Front side

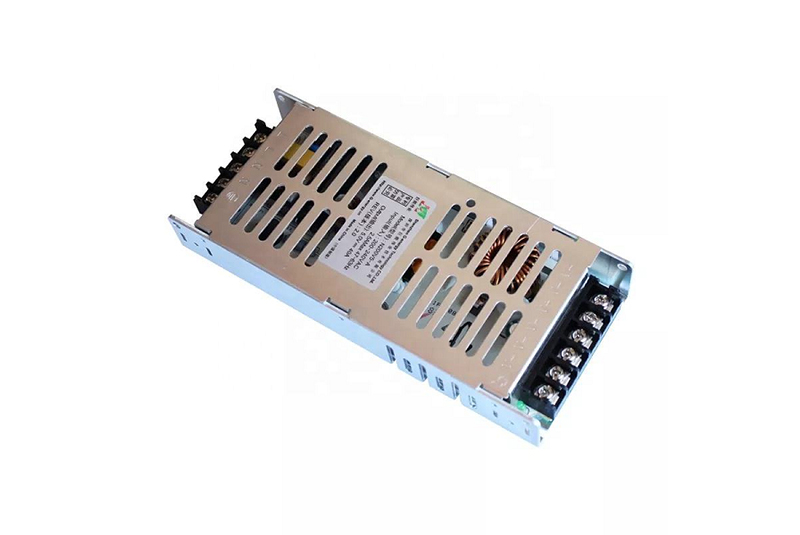
LED Display Power supply

<p>Model:200W 5V 40A ,300W 5V 60A<br /> N200V5-A</p>
Read More
ABOUT4
LED Screen Display

Sign Up and Never Miss a Deal Again

Longcheng firmly believes that quality is the soul of a product. Adhering to every standard, every process of production, and every detail of service, we aim to create the greatest value for our customers. We provide professional and considerate LED display technology consulting services. With 24-hour service response, we warmly welcome your inquiries.
Your Name*

Email*

Tel*

WhatsApp*

Message*

Latest News

Check out our blog posts

View More
How Many Spare LED Display Modules Should You Order for a Project

How Many Spare LED Display Modules Should You Order for a Project?

When people plan an LED display project, they mostly look at pixel pitch and brightness. They also check cabinet size, refresh rate, and total screen cost. Spare LED display modules get ignored a lot. This happens until something breaks after installation. A tiny module failure can cause obvious visual flaws. It can also lead to expensive downtime. This is very true for commercial displays. Rental screens, outdoor billboards, and stadium displays fall into this group. These revenue-generating systems need to stay active. For most projects, holding 2% to 5% spare LED display modules makes a good starting point. The final amount relies on a few details, though. You must look at your screen size and operating environment. Maintenance access matters too. You should also think about supplier lead time and the true cost of downtime.   How Many Spare LED Display Modules Do You Normally Need? You will not find one perfect percentage for every LED screen. A small indoor conference display carries a very low operating risk. Meanwhile, a rental screen travels a lot. An outdoor display faces heat, rain, and heavy humidity. These tough environments raise the risk of damage. Is 2% to 5% a Reasonable Range? For plenty of fixed LED installations, 2% to 5% works as a helpful guide. You do not have to treat it as a strict rule. Let us say a screen holds 500 modules. A 2% reserve gives you 10 spare modules. A 5% reserve gives you 25 modules. The gap in upfront cost stays quite small compared to the whole project value. That extra stock becomes highly valuable later. It saves you when replacement parts take weeks to arrive. The best quantity must reflect your chances of hardware failure. It must also match the financial impact of screen downtime. Which Projects Usually Need More Spare Modules? The project type drives your spare-parts planning. Some screens face frequent handling or harsh environments. Others deal with tough maintenance conditions or slow replacement lead times. These setups always demand a bigger reserve. Why Do Rental LED Displays Need More Spares? Workers constantly assemble and take down rental LED screens. They transport and install them over and over. This heavy action raises the chance of breaking things. LEDs, connectors, masks, and modules take a lot of abuse. For rental companies, a broken module costs more than just buying a new part. Sometimes the screen stays broken before the next big event. The operator loses precious rental income. They might also pay for emergency shipping and extra technician labor. Because of this, busy rental inventory needs extra spare modules. A fixed indoor installation just needs fewer parts. Why May Outdoor Screens Need More Spare Stock? Outdoor LED displays fight rain, dust, and deep humidity. They also handle wild temperature swings and long working hours. These rough conditions push up maintenance needs over the years. Getting to the screen matters a lot. A giant outdoor billboard might sit high up on a tall building. You might need special lifting gear and expert technicians to reach it. Waiting for late replacement parts extends your downtime. It drives up your repair bills too.   Why Is It Better to Order Spare Modules With the Original Screen? Some buyers delay buying spare modules. They just want to lower their early project budget. Buying replacements years down the road causes trouble, though. You will likely face weird compatibility and ugly color-matching issues. Why Does the Production Batch Matter? An LED module with the exact same pixel pitch and size is rarely a perfect match later. Factories change things over time. LED lamp batches, driver ICs, and PCB designs shift. Scan modes, connectors, and basic production settings evolve too. A new replacement might work perfectly on an electrical level. However, tiny shifts in brightness or color cause visual issues. The fresh module will look odd next to the older surrounding screen. Buyers must write down the exact module model and dimensions. They should track the resolution, LED package, and driver IC. Scan mode, voltage, and connector layout need tracking too. Buying your spare modules along with the original display remains the smartest move. It gives you the best chance of a flawless match.   How Do Spare Modules Affect Total Cost of Ownership? Extra modules surely raise the initial purchase cost. You must weigh this against the painful cost of screen downtime. What Costs Should Buyers Consider? The true cost of a module failure adds up fast. You might pay for emergency international shipping and expensive technician labor. You also need to rent access equipment. You suffer from lost advertising exposure and missed rental income. A short outage hurts paid campaigns on a commercial advertising screen. For a rental business, one damaged cabinet causes headaches. It directly shrinks the equipment pool ready for the next big event. Your main goal is not holding the absolute smallest inventory. You want to keep enough stock to drop your operational risk. You just want to do this without locking up too much cash. Should You Keep Other LED Display Spare Parts? Modules are not the only parts that stop an LED screen from working. Which Components Are Worth Stocking? Based on the project, buyers hold onto other parts too. They keep spare power supplies and receiving cards. They store data cables, connectors, and HUB boards. Module masks and tiny hardware pieces help as well. A cheap receiving card or power supply deserves a spot on your spare stock shelf. If it fails, a huge section of your screen goes dark. Spare-parts planning must focus on real operational impact. It should never focus on just the component price alone. How Can You Calculate the Right Spare Quantity? A risk-based approach works much better. Applying the exact same percentage to every single project fails in the real world. Which Factors Matter Most? Look at your total number of modules first. Next, think about your daily operating conditions and maintenance access. You must also check your replacement lead time and downtime cost. An indoor fixed installation enjoys fast local technical support. It can safely stay near the lower end of the 2% to 5% range. A stadium screen or outdoor billboard faces tougher lives. Remote installations and rental fleets need more protection. These setups easily justify a much higher reserve. Buyers need to verify how many modules go into each cabinet. This step makes calculating spare inventory much easier. You look at the full screen configuration. You avoid guessing based only on the total screen area. How Should Spare LED Modules Be Stored? Spare modules must stay easy to identify. They must remain fully usable during the entire service life of the display. What Information Should Be Recorded? You must link each spare module to its specific project. Record the pixel pitch, module model, and cabinet type. Note the production batch and purchase date as well. Keep the modules in a dry and safe room. Handle them carefully with proper electrostatic precautions. Testing several spare modules during the early commissioning phase helps a lot. You catch annoying compatibility problems right away. You fix them before the screen starts its long-term operation.   Conclusion For most commercial LED display projects, 2% to 5% spare LED display modules forms a solid starting range. Your final quantity must match your actual project risk. Indoor screens boast easy maintenance and quick supplier support. They demand fewer spares. Rental displays and outdoor installations face harder conditions. Stadium screens and revenue-critical LED walls need a bigger reserve. For these setups, downtime costs way too much money. The smartest plan involves ordering compatible modules early on. You should document the original screen configuration in detail. Store your spares the right way. Finally, add critical components like power supplies and receiving cards into your daily maintenance plan. FAQs How many spare LED modules should I order for a 1,000-module screen? If you use a 2% to 5% planning range, 20 to 50 spare modules makes sense. The final number changes based on your maintenance conditions. It also depends on your replacement lead time. Can I buy replacement LED modules several years later? Yes, you can. Finding an exact match gets much harder later, though. Factories update LED batches and driver ICs. They change PCB designs, brightness levels, and connectors over the years. Do I need spare power supplies and receiving cards too? Yes, you do for most commercial LED display projects. Keeping compatible power supplies and receiving cards on hand helps a lot. It cuts down your repair time. It also stops unnecessary screen downtime from hurting your business. Title: How Many Spare LED Display Modules Should You Order for a Project? Meta Description: Learn how many spare LED display modules to order, with 2%-5% planning guidance, downtime risks, storage, and maintenance tips. Keywords: spare LED display modules, how many spare LED display modules to order, spare LED modules for LED screen projects
How Many P3.91 LED Panels Do You Need Screen Size, Cabinet Count and Resolution Calculator

How Many P3.91 LED Panels Do You Need? Screen Size, Cabinet Count and Resolution Calculator

Setting up a P3.91 LED video wall begins with three main choices. You must decide the final screen size, the cabinet quantity, and the native resolution. A simple math mistake can cause serious problems. It might lead to an incorrect price quote or wrong content dimensions. You could also face weak rigging or extra shipping fees. This guide provides a helpful method for event companies and AV integrators. Venues, churches, and production crews can also use it. It shows how to estimate a modular outdoor rental LED screen easily.   Which P3.91 Specifications Are Needed for the Calculation? Start your work by checking the cabinet dimensions and the cabinet resolution. Do not rely on the product name alone. P3.91 rental LED panels are available in several formats. Therefore, your math must use the specific cabinet chosen for the job. What Are the Cabinet Size and Resolution? Longcheng’s P3.91 rental LED screen comes in two main options. You can pick 500 × 500 mm or 500 × 1,000 mm die-cast aluminum cabinets. A single 500 × 500 mm cabinet takes up 0.25 m² of space. It features a native resolution of 128 × 128 pixels. The spec sheet also shows 65,536 pixels per square meter. Meanwhile, a 500 × 1,000 mm cabinet covers 0.5 m². It uses the same module layout. This results in a calculated resolution of 128 × 256 pixels. These cabinets work well for both hanging and ground-stacked setups. They are great for concerts, festivals, and trade shows. You can also use them for temporary stage displays. How Do You Calculate the Number of P3.91 LED Panels? Imagine you want a rectangular wall made of 500 × 500 mm cabinets. You need to divide your target width and height by 0.5 meter. Sometimes, your measurement is not a perfect multiple of 0.5. In that case, you must change the size or round up. Do this before you approve the final price quote. What Formula Should You Use? You can apply these basic P3.91 LED panel calculation formulas: Cabinets across = screen width ÷ 0.5 m Cabinets high = screen height ÷ 0.5 m Total panels = cabinets across × cabinets high Think about a 5 m × 3 m P3.91 LED wall. It requires the following setup: 5 ÷ 0.5 = 10 cabinets across 3 ÷ 0.5 = 6 cabinets high 10 × 6 = 60 LED panels The completed display spans 15 m². You will need extra parts like spare modules and power supplies. Receiving cards and backup cabinets are also important. You must add these items separately. They do not form part of the active screen area. What If the Requested LED Screen Size Is Not Modular? Sometimes, a buyer asks for a 4.2 m × 2.4 m LED wall. However, 500 mm cabinets cannot match those exact numbers. You must round up the measurements. This change creates a 4.5 m × 2.5 m screen. It takes nine cabinets across and five cabinets high. In total, you will need 45 panels. Always talk to the client before finalizing the design. Find out if they want the closest larger size or a smaller option. They might even prefer a new stage layout. This quick check stops problems later on. It helps avoid sudden changes to video content or truss dimensions. It also protects your shipping plans, ballast needs, and installation labor.   How Do You Calculate the Finished LED Wall Resolution? Physical dimensions tell you the total stage area the screen covers. On the other hand, native resolution is about the details. It shows the exact number of pixels the video processor handles. This number also decides how the visual content gets mapped.   What Is the P3.91 LED Screen Resolution Formula? When you work with 500 × 500 mm P3.91 cabinets, follow these rules: Horizontal resolution = cabinets across × 128 pixels Vertical resolution = cabinets high × 128 pixels Let us look back at the 5 m × 3 m example. It uses a 10 × 6 cabinet grid. As a result, its native resolution is: Horizontal resolution: 10 × 128 = 1,280 pixels Vertical resolution: 6 × 128 = 768 pixels Total pixel count: 1,280 × 768 = 983,040 pixels A video processor is able to scale a standard 1920 × 1080 source to fit this LED wall. Still, custom graphics are a better choice. Designers should build them for the screen’s native aspect ratio. This approach stops bad cropping and empty black bars. It also prevents stretched or blurry text. Which Common P3.91 LED Screen Sizes Can You Compare? Screen Size Cabinet Grid Total Panels Native Resolution 3 m × 2 m 6 × 4 24 768 × 512 4 m × 2.5 m 8 × 5 40 1,024 × 640 5 m × 3 m 10 × 6 60 1,280 × 768 8 m × 4.5 m 16 × 9 144 2,048 × 1,152 The 8 m × 4.5 m setup works extremely well for widescreen content. This happens because its cabinet grid matches a 16:9 ratio. Its native resolution follows that same format too. Different screen sizes might force you to crop or scale the media. This issue is not always a dealbreaker. However, the content team needs the exact LED wall resolution early. They must have it before they make presentation slides or sponsor graphics. It is also needed for video loops and live-event backgrounds.   How Should Viewing Distance Influence the Panel Plan? You should never pick your cabinet quantity based solely on the stage width. Many other factors matter. Think about audience distance and text size. Consider camera use, seating plans, and clear sightlines. The type of media being shown also affects the best screen dimensions. Is Four Meters a Practical Viewing-Distance Starting Point? Longcheng suggests about 4 m as the best viewing distance for its P3.91 configuration. Daktronics shares a standard industry rule for this. They say the ideal viewing distance in feet is roughly three times the pixel pitch in millimeters. For a P3.91 setup, this math gives about 11.7 feet, or 3.6 m. This number sits very close to the manufacturer’s own guideline. Treat that 4 m mark as a helpful guide instead of a strict rule. Some visuals need extra care. Small text, complex charts, and sponsor logos require proper testing. Close camera shots demand attention too. Big video images seen from far away are usually much easier to handle. You must think about the closest viewer before you finalize the cabinet order. Buying a massive wall without checking the front-row distance is risky. The audience might see the ugly pixel structure. On the flip side, picking an overly fine pixel pitch wastes money. It drives up the budget without giving any real visual upgrade. What Do Real P3.91 Projects Show About Panel Quantity? Real-world projects show how fast your equipment list and logistics expand. The calculated panel count is just the start. You must link it to flight cases and signal cabling. It also affects power distribution and rigging capacity. Truck space and setup labor are tied to this number as well. How Many Cabinets Can a Large Outdoor Stage Require? Longcheng’s project gallery shows a massive 200 m² P3.91 event backdrop in Inglewood, Los Angeles. This job used 500 × 500 mm cabinets. Each unit covers exactly 0.25 m². Therefore, the total area equals 800 active cabinets. The specific grid of cabinets across and high relies on the final stage shape. That same gallery highlights a 30 m² P3.91 concert-stage video wall in Sicily, Italy. It uses the exact same cabinet size. This smaller setup takes 120 cabinets. These two examples prove a key point. Screen area alone is never enough for solid project planning. Jumping from 30 m² to 200 m² does more than just add LED panels. It drastically increases handling time and flight-case needs. The testing workload and cable amounts go up. You will also need more power-distribution capacity and a larger spare-parts inventory. Finally, the job requires more trained technicians on site.   How Does Cabinet Count Affect Cost and ROI? The amount of P3.91 cabinets impacts much more than just the initial purchase price. It shifts the needed processing power and structural gear. It alters truck space and overall setup time. It also changes your maintenance stock, insurance rates, and long-term running costs. Which Items Belong in a Complete LED Screen Calculator? A useful P3.91 LED screen cost calculator must look at these items: Active LED cabinet quantity Spare modules and electronic components Video processor and control-system capacity Power and signal cables Hanging beams or ground-support hardware Flight cases and transport volume Setup and dismantling labor Maintenance and replacement expenses Longcheng is able to supply a full turnkey package. It includes LED panels, flight cases, beams, and cables. Control equipment, a video processor, and software come with it too. This bundled deal helps buyers see the true cost of a working system. It is much better than just looking at bare panel prices. Rental operators need to figure out ROI based on expected usage. Think about a 60-panel P3.91 LED wall. You might use it often at corporate events, weddings, and trade shows. It will likely yield a higher profit than a huge 144-panel stock. That larger inventory might just gather dust in storage for months. The ideal inventory size is rarely the biggest screen a business can buy. Instead, it is the cabinet quantity that fits your most common jobs. It should also allow you to split the panels up for multiple smaller events at once. What Should You Confirm Before Requesting a Quote? A detailed project brief helps the supplier do better math. They can accurately count the active LED panels and the needed support gear. A good brief also makes it simpler to compare price quotes from different brands. Which Project Details Should the Brief Include? You should share the following details: Target screen width and height Minimum audience viewing distance Hanging or ground-stacked installation Indoor, covered outdoor, or open outdoor environment Event location and operating hours Camera and live-broadcast requirements Video and graphic content format Available voltage and power distribution Transport and flight-case requirements Required spare modules or spare cabinets Be sure to say if the quote needs to cover extra services. Mention things like rigging, control gear, and power distribution. Ask about flight cases, technical training, shipping, and on-site help. Longcheng provides excellent cabinet customization and technical support. This lets buyers easily compare 500 × 500 mm and 500 × 1,000 mm options. They can even look at mixed layouts. The best choice depends on setup speed, screen shape, and inventory efficiency. Conclusion Sizing up a P3.91 rental LED screen is a step-by-step task. First, divide the wanted width and height by the cabinet dimensions. Next, multiply the cabinet grid to find your total panel quantity. Finally, multiply that same grid by the cabinet resolution. For a standard 500 × 500 mm P3.91 cabinet, every single panel adds 0.25 m². It also provides 128 × 128 pixels. Do not buy anything until you test the math against real-world factors. Check the viewing distance, aspect ratio, and processor capacity. Think about rigging, shipping, and setup labor. Do not forget maintenance stock and expected daily usage. This careful review turns a simple cabinet count into a solid project plan. It also gives you a much safer total-cost estimate. FAQs How Many P3.91 Panels Are Needed for a 4 m × 3 m Screen? If you use 500 × 500 mm cabinets, the wall needs eight cabinets across. It also needs six cabinets high. The total amount is 48 panels. This gives a native resolution of 1,024 × 768 pixels. The active display area equals 12 m². Can 500 × 500 mm and 500 × 1,000 mm Cabinets Be Mixed? You can mix them only under strict conditions. Their modules, locking systems, and electrical connections must match exactly. The receiving-card setups and calibration data must also align. Always check this compatibility with the manufacturer. Do this before you try to design a mixed-cabinet LED wall. How Many Spare P3.91 Cabinets Should a Rental Company Purchase? There is no perfect rule for buying spare cabinets. The right amount depends on event frequency and travel distance. Your repair skills, project risks, and service deals matter too. Many rental operators focus on smaller pieces first. They stock up on spare LED modules, power supplies, and receiving cards. They secure these vital parts before buying full spare cabinets for tours or risky events. SEO Title:How Many P3.91 LED Panels Do You Need Screen Size, Cabinet Count and Resolution Calculator Meta Description: Calculate how many P3.91 LED panels you need by screen size, cabinet count, and resolution, with practical formulas, examples, and project tips. Keywords: P3.91 LED panels, P3.91 LED panel calculator, how many P3.91 LED panels do I need
Curved LED Wall Radius Calculator How Many 500×500mm Cabinets Do You Need

Curved LED Wall Radius Calculator: How Many 500×500mm Cabinets Do You Need?

A curved LED wall can create a wider visual field and a more engaging stage backdrop, but the design must begin with accurate geometry. Ordering panels by screen width alone may result in the wrong radius, an unsuitable viewing angle, excessive structural weight, or a layout that cannot be assembled with the cabinet’s available angle settings. This guide explains how to calculate the radius, arc length and quantity of 500×500mm LED cabinets while also considering resolution, installation cost and maintenance.   Why Does the Curved LED Wall Radius Matter? The radius determines how sharply the LED wall bends. A large radius produces a gentle curve, while a small radius creates a deeper concave or convex shape. Before choosing a radius, the stage designer should consider audience distribution, venue width, camera positions and the distance between the screen and performers. Concave and Convex LED Walls A concave LED wall curves toward the audience. It is often used behind performers, speakers or exhibition stands because it directs the display toward the center viewing area. A convex LED wall curves away from the audience. It may be used around columns, scenic structures or outward-facing stage elements. The same number of rental LED panels can create very different results depending on the angle between cabinets. Therefore, screen width and cabinet quantity cannot define the final curve by themselves. Which Measurements Are Needed Before Using the Calculator? A reliable calculation requires several project dimensions. These should be confirmed before a quotation, structural drawing or content canvas is finalized. The most important inputs are the required radius, total central angle, screen height and cabinet width. Required Project Inputs Prepare the following information: Target curve radius in meters Required central angle, such as 30°, 60°, 90° or 180° Cabinet width, which is 0.5m for a 500×500mm panel Required screen height Minimum audience viewing distance Indoor or outdoor application Hanging, ground-stacked or wall-mounted installation Concave or convex configuration Permitted angle settings of the cabinet locks Longcheng’s product page lists 500×500mm and 500×1000mm die-cast aluminum cabinets, P2.604, P2.976, P3.91 and P4.81 pixel pitches, and front or rear maintenance. However, the public specification does not state the available curve-lock angles or minimum radius. These values must be confirmed with the engineering team before the final calculation is approved. How Do You Calculate the Number of 500×500mm Cabinets? When the desired radius and central angle are known, calculate the arc length first. The arc length represents the physical width of LED cabinets required along the curve. The result must then be rounded to a complete cabinet because a rental panel cannot normally be divided. Step 1: Calculate the Arc Length Use this formula: Arc length = Radius × Central angle in radians Convert degrees to radians with: Angle in radians = Angle in degrees × π ÷ 180 For a 5m radius and a 90° curve: Arc length = 5 × 90 × π ÷ 180 Arc length = 7.85m Step 2: Calculate the Cabinet Quantity Divide the arc length by the cabinet width: Cabinet quantity = Arc length ÷ 0.5m For the same project: 7.85 ÷ 0.5 = 15.7 cabinets The design therefore requires 16 cabinets across. Sixteen cabinets create an actual screen width of 8m. If the project must keep an exact 90° central angle, the adjusted radius becomes: Adjusted radius = 8 ÷ (π ÷ 2) = 5.09m This small adjustment is normal because the finished wall must follow whole cabinet dimensions.   How Can Cabinet Angle Be Used to Calculate the Radius? Some stage designs begin with the angle available at each cabinet connection rather than a predetermined radius. In this situation, the cabinet width and joint angle can be used to estimate the curve. The following calculation treats each cabinet as one straight chord in a polygonal arc. Radius Formula for a 500mm Cabinet Use: Radius = Cabinet width ÷ [2 × sin(cabinet angle ÷ 2)] For a 500mm-wide cabinet set at an illustrative 5° curve: Radius = 0.5 ÷ [2 × sin(2.5°)] Radius ≈ 5.73m A 90° curved wall would require approximately: 90° ÷ 5° = 18 cabinets The resulting arc width would be: 18 × 0.5m = 9m What Radius Does Each Angle Produce? Angle per cabinet Approximate radius 1° 28.65m 2.5° 11.46m 5° 5.73m 10° 2.87m These figures are geometric examples only. They are not confirmed angle settings for Longcheng’s product. Available positive and negative angles, permitted hanging loads and the compatibility of 500×500mm and 500×1000mm cabinets should be verified before ordering.   How Should Screen Height, Resolution and Weight Be Checked? Cabinet quantity across the curve is only one part of the bill of materials. Buyers must also calculate rows, native pixel resolution and the approximate panel weight. These values affect the video processor, rigging structure, labor plan, transport requirements and total project cost. Cabinet Rows and Total Quantity Suppose the 8m curved screen in the earlier example must be 4m high. Columns: 8m ÷ 0.5m = 16 Rows: 4m ÷ 0.5m = 8 Total cabinets: 16 × 8 = 128 This calculation should also include spare panels and replacement modules according to the event’s risk level. Native Resolution by Pixel Pitch Based on Longcheng’s published module resolutions, an 8m × 4m wall made from 500×500mm cabinets would provide approximately: Pixel pitch Screen resolution P2.604 3072 × 1536 pixels P2.976 2688 × 1344 pixels P3.91 2048 × 1024 pixels P4.81 1664 × 832 pixels Smaller pixel pitches generally suit closer viewing and detailed content, while larger pitches can provide better cost efficiency when viewers are farther away. Pixel pitch should therefore be selected according to viewing distance, content detail and budget rather than by resolution alone. Approximate Cabinet Weight Longcheng lists a weight of 6kg for the 500×500mm cabinet. A 128-panel wall would therefore have an approximate cabinet weight of: 128 × 6kg = 768kg This figure excludes hanging bars, cables, power distribution, processors, support structures and safety hardware. A qualified structural or rigging professional must approve the complete load before installation.   What Can Real Stage Projects Teach Buyers? Large public projects demonstrate why curved LED geometry must be planned before equipment reaches the venue. The dimensions may be much larger than a typical corporate event, but the same design principles apply to smaller rental screens. A Public Curved Stage Example For Adele’s Munich performances, the production used a curved LED wall reported at 244m wide and 18m high. This was not a Longcheng customer project, but it illustrates how curvature, sightlines, supporting structures and content design must work as one system. A radius error that appears minor on a drawing can become a major alignment problem across a wide stage. For smaller concerts, conferences and exhibitions, the lesson is the same: confirm the cabinet matrix, joint angle, radius and content resolution before manufacturing the structure or preparing the video files. How Can Accurate Calculations Reduce Cost and Improve ROI? A correct cabinet calculation prevents both overbuying and underbuying. Too many panels increase capital cost, freight, storage and maintenance. Too few panels may force the rental company to reject larger events or rent additional cabinets from another supplier. The best return comes from a cabinet inventory that can serve several repeatable screen sizes and stage layouts. Cost and Installation Factors A complete budget should include: LED cabinets and spare modules Flight cases and transport Hanging bars or ground-support structures Video processor and signal equipment Power distribution Installation and dismantling labor Receiving cards, power supplies and cables Storage, repairs and calibration Maintenance access behind or in front of the wall Longcheng’s curved rental series offers multiple pixel pitches, die-cast aluminum construction, corner protection, front or rear service, and hanging, floor-standing or wall-mounted options. These features can support flexible rental applications, but the final configuration should still be based on project drawings rather than a standard package. Conclusion: What Should You Confirm Before Ordering? A curved LED wall radius calculator provides a useful starting point, but the result must be converted into a buildable cabinet matrix. Before placing an order, complete one final technical check. Final Planning Checklist Confirm the following: Required radius and central angle Number of 500×500mm cabinets across and high Available concave or convex lock angles Actual dimensions after rounding to whole cabinets Pixel pitch and native screen resolution Total cabinet and rigging load Processor capacity and content canvas Installation and maintenance access Spare cabinet and module requirements Engineering approval for the complete structure Accurate calculations reduce on-site changes, control labor costs and make the same cabinet inventory easier to reuse across concerts, exhibitions, conferences and corporate events.   FAQs How Many 500×500mm Cabinets Are Needed for a 10m-Wide LED Wall? Divide the required width by 0.5m: 10m ÷ 0.5m = 20 cabinets across The total quantity also depends on screen height. A 10m × 4m wall requires 20 columns and 8 rows, giving a total of 160 cabinets before spare units are added. Can the Same Cabinets Build Both Flat and Curved LED Walls? They can only do so when the cabinet and locking system are designed for both flat and angled connections. Buyers should confirm the available positive and negative lock angles, flatness tolerance and approved installation method with the supplier. Is a Smaller Curved LED Wall Radius Always Better? No. A smaller radius creates a deeper curve, but it may reduce usable stage space, complicate sightlines and require sharper cabinet angles. The ideal radius should fit the venue, audience position, screen width, content design and cabinet’s mechanical limits.
Front-Emitting vs Side-Emitting Transparent LED Screens Which Is Better for Retail Windows

Front-Emitting vs Side-Emitting Transparent LED Screens: Which Is Better for Retail Windows?

A shop window must perform two tasks simultaneously. It needs to grab attention using digital content. At the same time, it must keep the products and the store interior visible through the glass. Therefore, picking between a front-emitting and side-emitting transparent LED screen is not just a simple tech choice. The final choice relies on several factors. These include transparency, pixel density, and daylight visibility. Viewing distance, energy consumption, setup, and maintenance costs also play vital roles. For store owners and AV integrators, the ideal display achieves the storefront’s marketing aims. It does this without acting as a solid digital wall.   What Is the Main Difference Between Front-Emitting and Side-Emitting Transparent LED Screens? Both layouts build a see-through display. They do this by keeping empty gaps between the LED strips. However, the diode direction and physical frame alter how much of the glass stays visually clear. Industry experts note that side-emitting transparent LED designs give better light passage. They also show fewer visible support frames. Meanwhile, front-emitting designs can handle much tighter pixel arrangements. Why Does Front-Emitting Favor Image Detail? Front-emitting LEDs point straight at the audience. This setup is highly beneficial when buyers walk near the glass. They often need to read tiny text, view item specifics, check prices, or look at dense graphics. Longcheng’s ATS Series transparent LED window display gives a clear illustration. The front-emitting types feature P2.6-5.2, P2.8-5.6, and P3.9-7.8 options. The pixel density hits 73,728 dots/m² on the sharpest model. Meanwhile, the transparency sits between 50% to 60%. The peak brightness reaches 4,500 nits. Why Does Side-Emitting Favor Transparency? Side-emitting LED packages lower visual blockage in the observer’s line of sight. This makes them highly appealing for clothing boutiques, jewelry displays, and auto showrooms. In these places, the actual merchandise behind the panel stays a crucial element of the whole presentation. ATS side-emitting models deliver 70% to 80% transparency. They also offer 5,000-nit brightness. Their pixel pitches range from P3.9-7.8 to P10. Put simply, the shop owner gives up a bit of image sharpness at the larger pitches. In return, they gain a much clearer storefront view.   Which Type Creates the Better Retail Window? No single option wins every time. A helpful evaluation begins with the core goal of the glass setup. You must decide between close-range product communication or maximum visibility into the store. How Do Transparency, Brightness, and Pixel Density Compare? The ATS P3.9-7.8 option proves highly practical. This is because it comes in both builds. The front-emitting version brings 60% transparency, 4,500 nits, and 32,768 dots/m². The side-emitting version keeps nearly the identical pixel density. However, it boosts the transparency to 70% and the brightness to 5,000 nits. This makes the compromise very obvious. The side-emitting type gains 10 extra percentage points of see-through clarity. It also adds extra brightness. On the other hand, front-emitting models supply tighter-pitch selections. These are ideal for closer viewing spots. How Should Viewing Distance Influence the Choice? People might walk just a few meters from the shop glass. In this case, a smaller pixel pitch makes words, brand marks, and item pictures look much sharper. Consider a massive retail window seen from across a wide street or a huge mall lobby. Here, a wider pitch works fine. It also lets you focus more on keeping the glass clear. Always test actual marketing media at the planned viewing range before buying. Thin fonts, QR codes, price tags, and tiny product details highlight resolution flaws. They do this much quicker than bright video clips. How Do Daylight and Visual Merchandising Affect the Decision? Store signs constantly deal with sunshine, glare, dark glass, indoor lamps, and real goods. Therefore, you must judge a transparent LED display as one piece of the entire storefront. Do not treat it merely as a standalone monitor. How Much Brightness Is Actually Needed? Stronger brightness lets promo media fight against natural light. Still, hitting maximum nits should never be the sole goal. Shop operators must note the window direction, glass style, sun exposure, and active hours. After that, they can pick proper daytime and night brightness settings. The ATS Series delivers 4,500 nits for front-emitting models and 5,000 nits for side-emitting models. It also maintains a refresh rate of at least 3,840 Hz across the whole lineup. A street-facing window faces harsh sunlight. Here, the added brightness of a side-emitting unit proves quite helpful. An indoor shopping center features controlled lighting. In that setting, clarity and pixel pitch matter much more than running the screen at peak brightness. Why Is Transparency Also a Merchandising Metric? A transparent LED window functions best when digital media and real items complement one another. A 2021 Frontiers in Psychology eye-tracking report gathered 50 subjects. The team kept good gaze data for 46 of them. The scientists discovered that a massive media screen pulled in strong visual focus. It also effectively shared new items and special deals. The real-world lesson for shop windows is quite basic. Do not change the glass into a blinding digital wall. Keep open visual gaps around key products. Also, check if buyers can still recognize the goods placed behind the LED panel.   Which Design Costs Less to Operate and Maintain? The initial buying price forms just one piece of the transparent LED screen total cost of ownership. Power bills, repair access, part swapping, and offline time grow crucial over several years. This is especially true for large chains running dozens of panels. How Much Can Power Use Change the Running Cost? Longcheng states an average power draw of roughly 200 W/m² for front-emitting ATS models and 260 W/m² for side-emitting versions. Think about a sample 10 m² shop window running 12 hours daily. That 60 W/m² gap equals about 2,628 kWh per year. Let us assume a power cost of $0.15/kWh. The price gap would hit roughly $394 per year per screen. This fact does not instantly make front-emitting the superior choice. Better transparency might excuse the extra running expense. This happens when keeping goods, display rooms, or store layouts visible remains crucial to the brand’s vision. Why Does Maintenance Affect ROI? Crews often mount transparent screens very close to the shop glass. In these tight spots, repair access gets tough. Heavy teardowns for a broken LED strip or power part raise labor fees. They also increase the time the screen stays dark. The ATS build utilizes standard aluminum cabinets. It includes plug-in power and data links. It also features separate, easy-to-remove modules and LED strips. The stated weight is 9.5 kg/m². Meanwhile, the cabinet depth sits at roughly 50 mm. These details let technicians check frame needs and repair access before buying. This prevents finding tough upkeep issues after the setup.   What Can Retailers Learn from a Real Transparent-Window Project? A true case study proves very helpful. It reveals how a clear digital window impacts daily shop tasks and buyer habits. It goes beyond just picture quality. What Happened at Café Nouria in Maine? LG and retail tech firm Abierto shared a blind shopper test. This took place at a Café Nouria convenience store in Maine. They utilized a 14 mm transparent LED film. The setup delivered 73% transparency. It let digital promos play smoothly. At the same time, workers kept a clear view of the fuel pumps and parking zones. The report noted good impacts on impulse buying. It also improved ad memory and brand image. The team did not share a strict long-term sales bump number. Thus, readers should not view the outcome as a strict ROI standard. That setup used clear LED film instead of a cabinet-style system like ATS. Still, the task highlights a core retail rule. The value of a transparent display comes partly from what it does not block. Which KPIs Should Retailers Track? During a trial run, shop owners need to track several things. They should watch window lingering time and store entry rates. They must also check promo item sales, display uptime, and ad loading speed. Repair hours and power usage are also key metrics. Reviewing these numbers before and after the setup gives a solid foundation. It helps you see if a smaller pixel pitch, better clarity, or cheaper running costs bring the highest reward. For multi-branch plans, these same numbers show something else. They reveal if one screen setup does better in street-facing shops compared to indoor malls. Conclusion Front-emitting transparent LED screens usually perform better in specific cases. They excel when close viewing, finer pixel density, and detailed advertising content remain the top goals. Side-emitting screens look much more appealing in other scenarios. They win when sightlines, daylight, merchandise visibility, and higher transparency hold the most value. Longcheng’s ATS Series supplies both builds inside a single product line. This lets shoppers weigh transparency, brightness, and pixel pitch accurately. They can also check power use and cabinet style on a level playing field. This beats comparing totally different display brands. A high-end showroom or massive glass front might benefit more from a side-emitting unit. It often delivers a superior balance. A small shop window has different needs. Here, buyers stand near the glass, and fine details matter greatly. In this case, a front-emitting screen usually fits best. You must confirm the ultimate choice carefully. Always test real campaign content, the actual storefront glass, expected viewing distance, and lifecycle cost before launching a massive rollout. FAQs Is 70% Transparency Enough for a Retail Storefront? In numerous retail settings, 70% transparency preserves a solid view through the glass. It does this while still showing vivid digital ads. Still, the perfect level relies on several factors. These include product grouping, window size, indoor lamps, and glass shading. It also depends on how much you value the view from the outside looking in. Is a Smaller Pixel Pitch Always Better? No, it is not. A tighter pixel pitch boosts picture sharpness. However, it can raise the price and drop the see-through rate. This happens because extra LED parts fill up the viewing zone. Shop owners must pick a pitch that shows a crisp graphic at the actual viewing range. Then, they must ensure the final transparency level still fits the visual display plan. Which Option Is Better for a Chain-Store Rollout? Large chain brands must look past mere picture quality. Box uniformity, remote media updates, and error tracking matter greatly. Power draw, spare part access, and setup ease also shift the lifetime costs. For instance, Longcheng’s ATS platform handles cloud-based group control. It permits remote schedule updates, feed tracking, and error alerts. These tools grow vital when running monitors across dozens of retail spots.
Outdoor P4.81 Rental LED Display Buying Guide How to Choose the Right Screen for Events in 2026

Outdoor P4.81 Rental LED Display Buying Guide: How to Choose the Right Screen for Events in 2026

Picking an outdoor LED screen for a concert, festival, sports match, exhibition, or brand campaign takes more work than just looking at prices. The display has to stay clear during sunny days. It must also work safely outside. Crews need to set it up fast. Furthermore, it must display fluid video for the live crowd and TV cameras. An Outdoor P4.81 Rental LED Display serves as a smart option for medium and large events. This model nicely balances picture quality, viewing distance, easy transport, and total budget. This guide explains the core details buyers need to review before asking for a price quote in 2026. Why Is P4.81 Suitable for Outdoor Events? P4.81 means the gap between adjacent pixels measures about 4.81 millimeters. This pixel pitch changes the picture sharpness. It also decides the best viewing distance, the actual screen size, and the final price. For many outdoor rental tasks, P4.81 provides a great middle ground. It blends solid visual results with a reasonable investment cost. How Does Viewing Distance Affect the Choice? P4.81 works perfectly when people stand a few meters back from the display. It fits well on outdoor stages and in public watch zones. You can also use it for roadshows, sporting events, retail promos, and big festival video walls. Buyers must check the closest audience spot before they place an order. For close-up viewing, a tighter pitch like P3.91 might be a better fit. This is especially true if the video contains tiny text. For massive screens viewed from a long distance, P4.81 delivers crisp images. It does this without making buyers pay for extra pixel density that viewers will never see. Why Is Weather Protection Important? Outdoor event gear often deals with dirt, rain, extreme heat, and fast weather shifts. Because of this, a rental display needs a tough cabinet. It also requires shielded cable links and a proper ingress protection rating. Longcheng’s Outdoor P4.81 Rental LED Display comes with IP65 weather defense. It also uses a strong die-cast aluminum cabinet. Buyers should always check the safety level of the back cabinet covers. They must look at the power plugs, signal ports, video processor, and power boxes as well. Which Technical Specifications Should You Compare? A helpful product review must look at the whole LED display system. It should not just focus on one big number. Brightness and refresh rate matter a lot. Cabinet style, maintenance access, and control system support also change how the screen acts during live shows. How Much Brightness and Refresh Rate Do You Need? The screen brightness must fit the display direction and running hours. It also depends on shadow cover and the local weather. A screen pointing right at the sun needs a special setup. This setup will differ from a screen used only at night or under a stage roof. The refresh rate holds great value for concerts, live TV feeds, and sports matches. It is crucial for any camera-heavy production. A faster refresh rate cuts down on ugly screen flicker. It also removes dark scan lines from video recordings. Longcheng provides both 1920 Hz and 3840 Hz refresh rate choices for this rental display lineup. Which Cabinet Format Is Better for Rental Use? Crews move, build, take down, and store rental LED screens quite often. Because of these steps, cabinet size and weight change the amount of required labor. They also impact truck space, building speed, and long-term running costs. Longcheng makes both 500 × 500 mm and 500 × 1000 mm cabinets. These units weigh about 6 kg and 13 kg. Mixing these matching cabinet types gives rental crews more freedom. They can easily build many different screen shapes. Having both front and back service access makes repairs much simpler in tight spaces. How Should You Choose the Screen Size and Layout? The screen size must fit the event space and the crowd zone. It should align with the viewing distance, video format, and safe weight limits. A tiny screen is hard to read. On the other hand, a massive video wall will drain your funds without truly helping the audience enjoy the show. What Venue Details Should You Collect? First, measure the open setup width and height. Note the closest and furthest viewing spots. Check the stage height, crowd sightlines, and any blocked views. Buyers must also verify the roof lifting limits and the floor strength. They need to know the local wind speeds, total power supply, and safe working paths for the crew. For big festivals or sports fan zones, you must make a choice. Decide if one main center display works well enough. Sometimes, you might need extra side screens. Make this choice based on how well the crowd can see the stage, not just on the total ticket sales. How Does Content Affect the Final Layout? Live camera feeds, sponsor signs, and sports scoreboards need different pixel counts. Slides, ads, and social media posts also have unique layout needs. You must find the smallest text, brand logo, or picture in your media. Make sure that specific item stays easy to read from the normal crowd standing area. The final grid of cabinets sets the true pixel count of the screen. Always ask your supplier for the exact physical measurements. Request the total cabinet count and the final image resolution. You should also get the expected power draw and the best video processor model before factory production starts. Which Installation and Design Options Matter Most? Outdoor rental LED walls can stand on the ground or hang from metal trusses. They can be flat, curved, or built right into a custom stage design. You must pick the setup method very early on. This choice changes which cabinets you buy. It also alters the frame design, wire paths, and required worker count. Should the Screen Be Ground-Supported or Hung? Ground stacking works great when roof lifting points are missing. It is also smart when the screen is extremely heavy. Hanging the screen saves stage floor space. It gives the whole set a very clean look. However, hanging setups need certified metal trusses and strong lifting gear. They also demand expert weight math. Trained workers must check the local wind speeds and the heavy base weights. They need to test the frame strength and plan safety steps for bad weather. They must also plan the electrical grounding and wire paths before they build the screen. Do You Need a Flat or Curved LED Wall? A flat LED wall does a fine job for normal video clips. It suits sports games and business meetings perfectly. A curved LED wall creates a deep, wrapping stage background. It can smoothly follow the round edges of a trade show booth or a concert stage. Longcheng’s rental display frame allows for mixed panel joining. It supports both inside and outside curve shapes. This handy feature helps staging firms use their current screen stock better. They can build basic flat screens and unique art shapes with the exact same gear.   What Should You Ask the Supplier Before Ordering? A skilled supplier will turn your stage and video needs into a full technical plan. Keep in mind that the cheapest cabinet price rarely leads to the lowest final project bill. Which Documents and Services Should Be Included? Ask the factory for a cabinet drawing and a wire map. Get a power math sheet and a spare parts list. You should also demand the control system details, factory test logs, packing rules, and a clear paper warranty. Find out if the seller offers online help. Check if they supply color fixing tools, setup tips, and spare hardware parts. Shenzhen Longcheng Photoelectrictechnology Co., LTD. builds custom outdoor rental LED display systems. They also give deep technical support for global events. Their direct factory help lets buyers pick the right cabinet sets. It assists them with curved designs and special control tools for complex jobs. How Should You Compare the Total Cost? Add up the price of the LED cabinets and the video processors. Include the road cases, hanging beams, and lifting hooks. You must also count the power boxes, extra LED modules, shipping fees, and import taxes. Finally, add your local worker pay, warehouse rent, and repair costs. Rental firms need to think about build speed and crew size. They should look at how often the screen gets rented out. Gear flexibility matters a lot. The best screen runs without crashing and goes up fast. It fits many kinds of shows easily. The best value is never just the screen with the cheapest starting quote. Conclusion An Outdoor P4.81 Rental LED Display acts as a solid pick for concerts, festivals, and trade shows. It fits sports games, public squares, and retail sales perfectly. Before you buy, check the viewing distance and screen size. Look at the brightness, refresh rate, and rain defense. Review the cabinet weight, repair access, metal frame, and control gear. A clear project plan helps the factory suggest a safe, fast, and budget-friendly setup. FAQs Can a P4.81 Rental LED Display Be Used in Rain? Yes, it can. An outdoor model with a good IP rating works fine in standard outdoor weather. Even so, you must protect the power boxes, video tools, wire plugs, and data cables. The metal frame needs proper cover too. Users must follow the safety rules from the factory. They should turn off the screen during violent storms. Is P4.81 Better Than P3.91 for Every Event? No, it is not. P3.91 gives sharper image details for crowds standing very close. On the flip side, P4.81 saves money for massive screens and longer viewing gaps. The right pick relies on where the crowd stands. It depends on the media type, the stage size, and your total funds. What Information Is Needed for an Accurate Quotation? Share the exact screen width and height. Tell the factory about the event style and the closest crowd distance. Explain your building method, media format, and daily running hours. List your home country and your target shipping date. Also, state if you need road cases, hanging beams, or video processors. Mention any needs for spare parts, curved cabinets, setup help, or custom brand logos.  
How Much Can an Energy-Saving Outdoor LED Screen Reduce Electricity Costs A Complete ROI Analysis

How Much Can an Energy-Saving Outdoor LED Screen Reduce Electricity Costs? A Complete ROI Analysis

Outdoor LED screens offer excellent visibility for billboards, shopping centers, transit hubs, stadiums, and commercial buildings. However, electricity often becomes one of their biggest long-term costs. The cheapest purchase price does not always mean the lowest total expense. Choosing an energy-saving outdoor LED screen helps lower power demand and heat generation. It also reduces cooling pressure and daily operating costs. At the same time, it maintains the high brightness needed for outdoor advertising. Buyers can find its real value by figuring out the annual electricity savings. They should also look at the expected payback period before they invest. Why Do Outdoor LED Screens Consume So Much Electricity? Outdoor displays must create enough light to stay clear during the day. Their power use depends on several things. These include screen area, brightness levels, and the content shown. Pixel pitch, daily operating hours, and ambient temperature play a role too. Power supplies and cooling equipment also affect the final energy bill. Which factors increase outdoor LED screen power consumption? A bigger screen holds more LED modules, cabinets, and power supplies. Because of this, it needs more electricity to run. Brightness acts as another major factor. A display running at full brightness all day usually uses more power than one with automatic brightness adjustment. Also, bright and white content takes more energy than darker visual designs. Heat management matters just as much. Poor heat dissipation makes fans or air-conditioning systems work harder. This increases the total electricity cost for the installation. Why should buyers compare average and maximum power? Maximum power consumption mainly helps with circuit design, cable choice, and electrical safety planning. On the other hand, average power consumption works better for estimating real electricity bills. This happens because screen brightness and content change during normal operation. Buyers should always check a supplier’s power numbers. They need to know if the figure applies to a single cabinet, one square meter, or the whole LED screen. How Does an Energy-Saving Outdoor LED Screen Lower Power Use? Real energy efficiency comes from multiple parts working well together. These parts include the electrical architecture, cabinet design, and heat dissipation. Brightness control and the daily operating plan also make a big difference. How does common-cathode technology save energy? A common-cathode LED display gives red, green, and blue LED chips better voltage levels. This setup stops unnecessary electrical loss. It also limits extra heat inside the screen. Less heat generation can reduce stress on power supplies and electronic parts during long work cycles. This leads to more stable outdoor performance. It also lowers the energy needed for fans or cooling. How can automatic brightness control reduce electricity use? An outdoor screen does not need maximum brightness in every situation. Automatic brightness adjustment lowers the light output at night or during cloudy weather. It also helps when the display sits in a shaded spot. Scheduling software can turn the screen off during quiet hours. Furthermore, content teams can avoid using solid white backgrounds. This saves energy without hurting the advertising message. How Can Buyers Calculate Annual Electricity Savings? A useful calculation needs five main details. You need the current screen’s average power and the new screen’s average power. You also need the total screen area, the daily operating hours, and the local electricity price. What formulas should buyers use? You can estimate annual energy consumption with this formula: Annual energy use = Average power per square meter × Screen area × Daily operating hours × 365 Then, you can figure out the annual electricity cost like this: Annual electricity cost = Annual energy use × Electricity rate Annual savings show the difference between the electricity costs of the two systems. Remember to change power values from watts to kilowatts before you calculate kilowatt-hours. What does a 100-square-meter ROI example show? Let us say an old outdoor LED screen has an average power consumption of 450 W/m². Longcheng’s ES960 outdoor energy-saving LED screen shows an average cabinet consumption of 300 W for a 960 × 960 mm cabinet. This equals roughly 326 W/m². The product gives brightness choices from 5,000 to 6,000 cd/m². It also features IP66 protection and offers front-and-rear maintenance access. For a 100 m² screen running 12 hours a day at an electricity rate of $0.15 per kWh: Existing screen consumption: 197,100 kWh per year Energy-saving screen consumption: about 142,578 kWh per year Estimated annual reduction: about 54,522 kWh Estimated annual electricity saving: about $8,178 These numbers serve as a helpful example, not a strict promise. Real savings depend on the content, brightness schedules, and local weather. The setup and daily conditions also change the final results. What Should a Complete LED Screen ROI Analysis Include? Electricity savings make up just one part of the total cost of ownership. A good ROI model should look at the purchase, installation, and cooling costs. It must also include maintenance, downtime, and service-life expenses. Which upfront costs should be calculated? Buyers need to count the cost of LED cabinets, control gear, and steel frames. They should add power distribution, shipping, and installation labor. Testing, spare parts, and any extra price for the energy-saving system matter too. Suppose the energy-saving display costs $12,000 more than a standard choice. If it saves about $8,178 a year, the simple payback period looks like this: $12,000 ÷ $8,178 = about 1.5 years After this payback time, ongoing electricity savings help lower the total operating cost directly. Which long-term savings are often overlooked? Less heat generation can drop the need for fans or air-conditioning. Good waterproofing protects inside parts from rain and dust. Easy maintenance access speeds up repair times and causes fewer working delays. Shenzhen Longcheng Photoelectrictechnology Co., LTD. provides an outdoor energy-saving screen with common-cathode technology. It includes a 90% recyclable aluminum cabinet and IP66 protection. It also has great heat dissipation and front-and-rear service access. These features help fixed outdoor projects that want high efficiency and simple maintenance. How Can Buyers Achieve a Faster Payback Period? The product details show the screen’s possible efficiency. However, daily operating habits decide how much of that becomes real money saved. Which operating changes can improve ROI? Use light sensors or set brightness schedules to avoid useless maximum output. Turn the display off when no one is watching. Also, check the power needs of the advertising content. Tracking monthly electricity use helps a lot. A sudden jump in power use might point to wrong brightness settings or control-system faults. It could also mean failing power supplies or cooling issues. What should buyers confirm before requesting a quotation? Buyers must share the screen size, pixel pitch, and viewing distance. They should state the needed brightness, daily operating hours, and local voltage. The electricity rate, installation spot, maintenance style, and control-system needs are important too. They should ask for average and maximum power numbers, testing rules, and circuit plans. Getting cabinet amounts, spare-parts advice, and written warranty details is smart. Having matching data makes an ROI calculation much more reliable. Conclusion An energy-saving outdoor LED screen offers great financial benefits when a large display runs for many hours daily. In the earlier example, dropping average power consumption from 450 W/m² to roughly 326 W/m² saves about 54,522 kWh. This equals $8,178 each year for a 100 m² screen. With an extra cost of $12,000, the simple payback period rests at about 1.5 years. Even so, every project must use real or supplier-checked data instead of guesses. Buyers should carefully review brightness, weather resistance, and maintenance access. They must check heat dissipation, reliability, and total lifecycle costs. Longcheng blends common-cathode technology with high outdoor brightness. They add strong aluminum cabinet construction and IP66 protection. This makes it a smart pick for projects looking for great visual results and long-term operating efficiency. FAQs How much electricity can an energy-saving outdoor LED screen save? The final amount changes based on the electrical design, brightness plan, and content. The local climate, screen size, and working hours matter too. Buyers should look at proven average power values under similar conditions. They should not rely only on a basic percentage claim. Is a lower-power outdoor LED screen always the best investment? No. The display must still match the project’s needs for brightness, refresh rate, and weather resistance. It has to handle the right viewing distance, maintenance, and reliability. The finest choice balances electricity savings with visual quality and lifecycle risks. What information is needed for an accurate ROI calculation? A precise calculation needs the screen area, average and maximum power consumption, and daily operating hours. You must know the local electricity rate, brightness schedule, and cooling demand. The purchase-price difference, installation cost, and expected service life are needed too. A deeper model might also look at maintenance costs, downtime, financing, and leftover value.
Home
WhatsApp
Email
Contacts