
Nullam dignissim, ante scelerisque the is euismod fermentum odio sem semper the is erat, a feugiat leo urna eget eros. Duis Aenean a imperdiet risus.
Nullam dignissim, ante scelerisque the is euismod fermentum odio sem semper the is erat, a feugiat leo urna eget eros. Duis Aenean a imperdiet risus.
 author
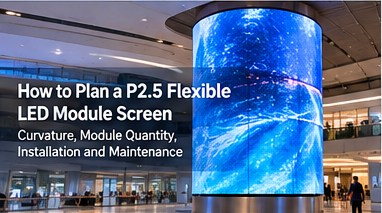
A P2.5 flexible LED module can follow columns, waves and surfaces that rigid cabinets cannot cover smoothly. Flexibility shifts the critical work to radius control, frame accuracy, alignment, heat dissipation and front-service access. Ordering modules before confirming the structure can produce visible seams, distortion or inefficient maintenance.
AVIXA describes flexible LED screens as displays that can conform to curved surfaces, while also advising buyers to include mounting, content management, installation and maintenance in the budget. This is a useful starting point for any flexible LED display project: the module price is only one part of the installed system.
Create an accurate drawing or 3D survey. Record width, height, radius at several points, curve direction, access depth, structural material, ventilation and nearest viewing position. Do not estimate irregular architecture from one measurement: small frame errors repeat across rows and become obvious at the final seam.
The Indoor P2.5 Flexible LED Module page lists P2, P2.5 and P3 configurations. Published module sizes are 320 × 160 mm for P2 and P2.5, and 240 × 120 mm for P3. It also lists 800 cd/m² brightness and refresh options of 3840 Hz for P2 and 1920 Hz for P2.5 and P3. The final choice should be checked against real content and camera use. P2.5 may be a balanced option for indoor commercial viewing, but P2 can justify its higher pixel load when viewers stand very close or need to read fine text.
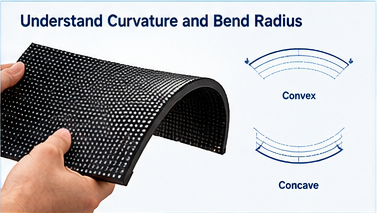
“Flexible” does not mean unlimited bending. The safe radius depends on the PCB, silicone base, component layout and installation method. Obtain the minimum concave and convex radius, allowed bending direction and fastening pattern for the exact model. Operating at the limit leaves less tolerance for frame errors and servicing.
For a simple rectangular curved surface, calculate the developed surface width along the arc, not the straight chord between its ends. Divide the developed width by module width and the display height by module height, then round to whole modules. Multiply the two results to obtain the active quantity. Add project-specific spares separately; they should not be counted as active area.
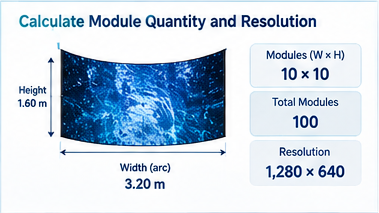
Consider a developed surface measuring 3.20 m wide and 1.60 m high. With 320 × 160 mm P2.5 modules, the layout requires 10 modules across and 10 modules high, or 100 active modules. A P2.5 module of this size contains 128 × 64 pixels, so the finished canvas is 1,280 × 640 pixels. If the physical arc does not divide exactly into 320 mm increments, adjust the structure or display boundary before fabrication rather than trimming a module on site.
| Planning Item | Calculation | Example Result |
| Columns | 3,200 mm ÷ 320 mm | 10 |
| Rows | 1,600 mm ÷ 160 mm | 10 |
| Active modules | 10 × 10 | 100 |
| Native resolution | (10 × 128) × (10 × 64) | 1,280 × 640 |
A curved canvas changes apparent proportions from different viewpoints. Test logos, text and faces from the main audience positions. Keep critical information away from the closing seam of a cylinder and from areas seen at extreme angles. Content should be previewed on the real geometry or a reliable simulation, because a flat desktop proof cannot reveal every distortion.
The product page describes a soft silicone module with embedded magnets and no conventional metal cabinet. Magnetic mounting can simplify front installation, but the steel surface still needs consistent curvature and flatness. Test magnet position, cable clearance and removal force on a sample. A flexible module follows an inaccurate frame; it does not correct one.
Design power and data zones from the final module matrix. Confirm module voltage, maximum current, scan mode, receiving-card output groups and the approved load per power supply under the expected temperature. Leave service loops that do not press against the PCB when it bends. Ventilation paths must remain open, particularly inside a column where power supplies and receiving cards can concentrate heat.
A documented Qatar Ministry of Environment and Climate Change installation used three flexible GOB screens at P1.56, including sizes of 9,920 × 2,400 mm, 5,120 × 2,400 mm and 1,600 × 2,880 mm. This was not a Longcheng project and uses a different pitch, but it demonstrates a transferable point: the project specified pitch, exact dimensions, curvature and protective treatment as one system. A P2.5 project should follow the same discipline instead of treating the soft module as an isolated component.
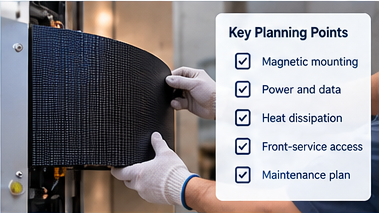
Front access is valuable only if a technician can remove a module without damaging its neighbors or overstressing the curve. Conduct a mock replacement before shipment. Label module positions, receiving cards, power zones and data paths. Store calibration files and keep compatible spare modules from the original batch, because LEDs and driver components can change over time and later replacements may not match visually.
Include the modules, custom frame, survey, processor and controller, power distribution, magnetic mounting surface, installation labor, access equipment, calibration, spare parts and content adaptation. Add the cost of closing a retail area or hiring a lift for maintenance. Compare a flexible solution with faceted rigid cabinets: flexible modules may cost more, but they can avoid visible polygon edges and bulky structures on a tight radius. The better ROI depends on visual requirements and service conditions, not on module price alone.
Approve a sample curve before mass production and test it through repeated installation, operation and removal. Define incoming-inspection tolerances for size, connectors, brightness and color. Keep a documented reserve through the LED display modules category and ensure replacements match the original model, batch and calibration. For a revenue-generating screen, a small spare stock normally costs less than emergency international shipping and prolonged downtime.
Planning a P2.5 flexible LED module screen requires more than choosing a pitch and total area. Confirm the developed dimensions, safe radius, module matrix, native resolution, supporting-frame tolerance, magnetic layout, power and data zones, thermal path and front-service procedure before production. A sample curved section and mock maintenance test can expose problems while they are still inexpensive to fix. These checks protect image quality, control installation labor and make lifecycle costs more predictable.
No. Every model has mechanical limits. Obtain the minimum concave and convex radius and fastening instructions for the exact module before designing the frame.
There is no universal percentage. Base the reserve on active quantity, failure impact, site access, supplier lead time and the cost of downtime, and buy matching batch stock with the original order.
Only when the mounting surface meets the required curvature, flatness, strength, ventilation and service-access conditions. A surveyed support frame is safer than an uneven architectural surface.












Leave a comments